Dragon Age 2: modding the Edge of Night axe into a longsword

Having a bit of fun with Dragon Age 2 in my spare time. The selection of longswords in Dragon Age 2 leaves much to be desired. Call me old-fashioned, but when I play fantasy RPGs, my warriors are always sword-and-shield (munchkin min-maxing be damned), because…that’s how heroic fantasy warriors are supposed to be. As TvTropes succinctly put it, Heroes Prefer Swords. I actually shelled out money for the Warrior Item Pack DLC hoping to find a better longsword. Unfortunately, the only decent one-handed weapon in the pack is an axe. An axe?! What are we, woodcutting barbarians?

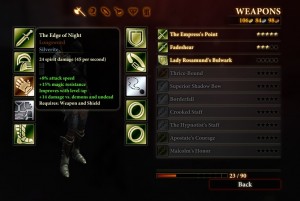
So I went about looking for a way to switch this otherwise beautiful weapon, The Edge of Night, into a longsword. The similarly named Edge of Song and Glory is the ideal target for the transformation.

There is not much modding possible for DA2 — the game is very much locked down to drive DLC sales. Nevertheless, the base game itself is at least unencrypted; however, there is no official mod editor support. The DLCs, however, are encrypted — you cannot even view the data contained within these files. The following modding method requires that you decrypt the DLC’s designeritems.erf file first, then extracting the Edge of Night’s item file for editing. This only works for PC versions of DA2.

Note that there is already a mod floating around for this. There is a good thing and a bad thing about this mod. The good thing is that it uses a less questionable method that does not need to decrypt the ERF file. On the other hand, because of the limitations of such a method, that mod doesn’t change the item icon or the item description. It will still look like an axe and call itself an axe in the character’s inventory screen — only the actual gameplay model is changed to a longsword. Some people would be satisfied with that; I wasn’t.

Decrypting designeritems.erf

DLC items are in found in ${DRAGON AGE 2 INSTALLDIR}/addins. In this case, it is the DA2_MTX_WAR addin. The ERF file is
${DRAGON AGE 2 INSTALLDIR}/addins/da2_mtx_war/core/data/designeritems.erf, and the UTI file is [dd9ea6bb335cfa89].uti.

Make a backup copy of the da2_mtx_war directory.

To decrypt the ERF file, you need the decrypt key and a decrypter. There is a tool called “slurpda2.exe”, usually distributed with the deda2drm decrypter package. I will not explain how to obtain this package, but it’s pretty easily found. If you legitimately own this game, slurpda2 will give you a list of all the decrypt keys, one for each DLC package. Use the right key (have to do trial-and-error here, as it doesn’t tell you which key belongs to which package) and deda2drm by cd’ing to the deda2drm directory and executing from the command prompt:

deda2drm.exe DA2_MTX_WAR [key]

The output will tell you whether this succeeded. If so, this will decrypt the ERF.

Extracting the UTI

A tool like PyGFF will open the decrypted ERF file. Look for the dd9ea6bb335cfa89 hash key and extract that UTI. For reference, the UTI should contain an item with the tag war100im_warrior_1h_sword. Save the UTI file as war100im_warrior_1h_sword.uti (though technically you can name the filename anything you want, as long as it ends in uti). As you can see by the name, even the original designers thought it should be a sword and not an axe :p

Editing the UTI

Using a tool like TlkEdit, open the UTI file. Change the ModelVariation field to 123 (which is the Edge of Song and Glory, as listed in 2da.rim’s item_variations.gda file). I believe 132 is Glandivalis / Vigilance, if you prefer that look. Change the Icon field to “ico_1h_sword_5.dds”. Save the UTI file.

Here you can choose to restore the original encrypted copy of da2_mtx_war or not. If so, this reverses the decryption so it doesn’t confuse DA2 when you open it again. Alternatively, you can edit the manifest.xml file in the decrypted copy of da2_mtx_war to tell it to skip the authorization requirement by setting RequiresAuthorization=0. I left mine unencrypted, but I think this gets into legal gray territory, and the UTI mod should work even with the original encrypted version.

Drop the final modded uti file into packages/core/override in either the DA2 install directory or the user directory in Documents/Bioware (create the override directory if needed).

Result

Edge of Night sword The Edge of Night sword in action

Isn’t that pretty? Wielding a sword, as a hero should. One of these days I’ll mod the TLK file to change the occurrences of “axe” to sword in its Codex file, and this change would be perfect.

I have a copy of the modded UTI file, but I think distributing it might violate the EULA. Oh well. If you can’t figure out the instructions, leave a comment here (with your email address) and I’ll try to help.

A Brief Guide to Golems of Amgarrak with a New Character

So I’ve been playing Dragon Age: Origins in the few spare hours I get every week. Having never finished Baldur’s Gate 2, this is redemption for my neglected gamer soul, I think. In general, it’s pretty easy. However, several of the most annoying battles in all of DAO are from the Golems of Amgarrak DLC. So far, all of the FAQs and guides I’ve seen (including videos on YouTube) are about absurdly min-maxed level 35 characters imported from Origins and Awakening, with elite gear, hundreds of poultices and potions, and the most overpowered skillsets.

This note is not about trouncing the Harvester with level 35 ubergeared supermen. Any halfwit can do that — just go get the gear, follow any YouTube min-maxing guide for DAO, and start whacking away. (My personal favorite: 100% dodge build: nothing can land a hit on you with physical attacks. Eat that, Harvester. But I digress). You can do this DLC easily with any properly geared character. This note is about how to complete Golems of Amgarrak on Nightmare difficulty with a newly created, level 20 mage, with stock gear and sneaky tactics. This is not to claim it’s the best way to accomplish the feat — just the way I managed it. If you have better ideas about how to use a newly created level 20 character to win, contribute them in the comments.

This note only applies to DA:O as played on the PC. On some console-based versions, the pet bronto cannot be controlled, making the final battle even more annoying than usual.

Background

If you don’t know yet, completing Golems of Amgarrak on Nightmare (or Hard, actually) difficulty awards all of the other characters in other campaigns (even existing campaigns’ characters) some really nifty items — but only nifty for lower level characters. This includes the amulet The High Regard of House Dace, which gives +6 cunning so Daveth can open up all those annoying chests in Ostagar, and The Reaper’s Cudgel, which is worth well over 300 sovereigns. The early cash allows you to buy the Blood Dragon Armor, the Spellward, and the Arcane Knowledge and Physical skill tomes from Bodahn immediately after Lothering before his store restocks; you can then buy another copy of these items after the restock.

With my time constraints, I will most likely play DAO only once. So I’d like to have these items in my Origins campaign, without having to complete the game first to get an absurdly well geared character to do Amgarrak. I thought I can just start a new Amgarrak campaign with a new character, and finish it to get my gear. Boy, was I wrong. People call this the hardest DLC for Origins, and for good reason. I played a warrior and simply could not win an initial fight against 4 elite golems, and had to delete, restart the campaign, and rethink my strategy.

General Setup

Despite claims, the module is not impossible, even with a new level 20 character. It is simply very poorly balanced for new characters, and forces you to proceed carefully and methodically. This is Dragon Age, not Diablo — as a new character, you cannot just rush into every battle, aggro’ing all the mobs at once. Separate mobs from each other, killing them one at a time, withdraw backwards to avoid being surrounded, pause frequently to issue new orders as the situation requires and don’t rely on the Combat Tactics scripts, and you should have very little difficulty dealing with most creatures in the module.

To win, I strongly suggest playing a mage. In fact, the best character for completing the DLC with is probably the mage, regardless of level. The main reason: there are no merchants, not nearly enough healing poultices, and most unfortunate of all, no other playable mage in the entire module. The objective is to preserve all potions and consumables until the final battle with the Harvester, which means the party will need to rely on mage healing spells.

The party at the start consists of a duel-wielding rogue, a bronto (with a charge attack and a Taunt), and the PC. The party at the end adds a sword-and-shield warrior (without Taunt!) and a Runic Golem with some typical golem abilities, plus a weak Group Heal, a Cleansing Aura, and Chain Lightning/Tempest spells. All of these characters are poorly configured with mediocre equipment, and the party only has one respec tome (Memoirs of the Grey Wardens).

Save the tome for the rogue. He’s going to be the main DPS character against the Harvester, but only if he’s an archer and standing far away from the action.

Attributes and Specializations

If starting this without having beaten Awakening, then the mage is restricted to three base specializations: Spirit Healer, Arcane Warrior, and Shapeshifter. Since Shapeshifter is worthless, the two specializations are decided already. If you have started Awakening, you might consider the Battle Mage instead of Arcane Warrior for additional utility, but Spirit Healer is an absolute must as a new character.

As a mage, 60+ magic is necessary for spells to have decent effect. The rest should be spent in willpower to pad out the mana supply. Usually, when you build a Mage for Origins or Awakening, you don’t want to put any points in Willpower. However, remember here, there are very few, very precious lyrium potions and no way to buy more; there are no special attribute bonuses that boost the mana pool for free; and the PC’s starting equipment is subpar and does not provide a large mana boost (and again, there is no way to buy better equipment). If you don’t take additional Willpower, you will not be able to cast during the long endgame battle against the Harvester, and that would be very unfortunate.

The mage should have maxed Combat Training to ensure that spells aren’t interrupted by ordinary attacks. Survival is a plus for the nature resistances, and the first level Vitality and Mana skills from Awakening. This is a pure combat module, with no ingredients for crafting and a grand total of two conversations — no need for Coercion or any of the crafting skills.

Talents

One might be tempted to build an armored arcane warrior, since this is a popular “I win” character build.

This would be … unfortunate. Normally, the arcane warrior is very overpowered: all the gear of a tank and the firepower of a mage. In this module, with a new character, you have neither of these advantages. The small module does not offer a merchant or any sort of decent armor, and a stock character does not have enough willpower to have a deep mana pool after putting up the arcane warrior defensive abilities. Wearing a robe, swinging a Warden’s Companion longsword with a mediocre shield, while not being able to cast healing spells — this is a recipe for disaster. Further, Brogan, the warrior in the party, is configured as a tank — a poor tank, but he can’t be respec’ed as a DPS due to lack of tomes, while the PC can be a DPS. Therefore, playing a support + nuker mage is probably a better choice. Some of the advice that follows will assume a mage with an assortment of crowd control and attack spells.

As for specific talents, since it’s a stock character, there aren’t that many points available. Here is my advice:

  • The Healing tree up to Regeneration is a must. As Spirit Healer, also take at minimum Group Healing, because both the golem enemies and the Harvester at the end have area-of-effect attack abilities that can damage an entire party. Remember that this character will be the only healer until the Runic Golem is fully upgraded, and even so, the Golem is a terrible healer. These healing spells are basically critical to finishing the module, and is why stock level 20 Warriors or Rogues have a hard time surviving.
  • Make sure to get Force Field, for several possible reasons. Crushing Prison is nice, but only if there are points for it.
  • It would be wise to take Mana Clash, at the top of the Mana Drain tree. In several battles (unfortunately, not the end battle), the party will face several spellcasters along with hard-hitting warriors. Mana Clash will immediately remove the casters from the scene, which trivializes the encounter.
  • For me, I took Tempest and Blizzard (from the Lightning and Cold trees), since I already have Spell Might from the Mana Drain tree. This sets up the Storm of the Century combination that was useful in one instance, but this is optional. I strongly recommend Cone of Cold in any case as it is an absurdly overpowered spell with a freezing effect that applies even to elites and bosses.
  • If taking Storm of the Century, or not taking Mana Clash, then Glyph of Neutralization is desirable. As for the other glyphs, since the main enemies are almost always elite or boss level golems and undead, they are often resisted — except the Paralysis Explosion combination, if set up correctly.
  • I did not use any other spells. If you have a favorite set, use the remaining points to take them. Remember that practically all enemies worth using mana on are Elite or above, so some spells that have minimum effect on elites are not worth taking.

Remember that only one party member will get a chance to respec, and the rogue should use it to reconfigure as a survival-minded DEX-based archer. This is because this underpowered party simply cannot stand toe-to-toe against any of the major enemies, and will rely on kiting (and not even simple kiting either, given the setup of the final battle) and off-tanking to survive many fights.

Jerrik, the Archer

Jerrik will be the main non-magical DPS. Unfortunately, he is setup as a frontline fighter. Because the tank is terrible, and can’t even manage threat effectively (no Taunt!), plus both enemy Golems and the Harvester have area-of-effect attacks to damage everyone in their immediate vicinity, this is a bad configuration. He must respec into a DEX-based DPS archer (enough STR to wear his armor, then all DEX), with Master Archer or Scattershot, Arrow of Slaying, and Feign Death (for the many times when the tank loses threat and the enemy rushes the archer). Optionally, he could take a few cunning and take Stealth to lose threat, though the final battle involves an elite boss and hordes of minions.

Major Battles

On Nightmare difficulty, in general, proceed slowly and cautiously, withdraw backwards into chokepoints when needed, and there should be minimal pain. In particular, when faced with multiple spellcasters, hit Mana Clash to remove most (if not all), and then rush them. Play this as a normal RPG and use the pause key frequently to strategize and adjust tactics. Try not to use any consumables until the final fight. For a general walkthrough, follow Gamebanshee’s Amgarrak guide.

There are two battles that takes some strategy to pull off, however. Some people are stumped here and can’t proceed further. They’re not hard, but you can’t use the normal tank-and-spank tactic with a level 20 Warden and a crappy party.

The ancient hall of golems

As soon as the party enters Amgarrak, there are three directions to go, two of which are sealed off at the start. In the third direction, there is a room with four stationary golems. Two of them are called Watchers, the other two are elites called Sentinels. When the party proceeds far enough into the room, these four will activate.

This is one of the toughest fights because the party does not have its warrior tank yet. Further, these four golems will open the battle by hurling rocks — which deals heavy area-of-effect damage and knocks down any character beside the Runic Golem. They will then follow by using Slam on the incapacitated character, and then Hurl Rock again, basically going into a stunlock until the character is dead.

Careful pulling is impossible, because all four activate at the same time. However, there is one good way to deal with these golems: The Hallway of Doom.

There is a chokepoint hallway going into the hall of golems. The party could fight the golems one-on-one at the doorway, but they’ll jut use Slam to knock the blocker out of the way and rush into the room. Then again, they won’t be able to do that …if the blocker is force-fielded.

Have the party hold position. Use the Runic Golem to trigger the four enemy golems, and then run back to the door. At the doorway, use the Runic Golem to block the door and force field the golem before he gets Slammed. Have the ranged DPS open fire. Force Field your own golem, because the enemy golems are elite and will have shorter Force Field durations.

For even better effect, throw down a Blizzard to slow the enemy as the Runic Golem approaches. Then, trigger Storm of the Century using Tempest, and then Force Field your Runic Golem before it gets seriously damaged. Now the enemy will stand in the massive electrical storm, be drained of stamina by the lightning storm’s side effect (so they can’t Hurl Rock or Slam anymore), and run around uselessly. When the Force Field expires, withdraw the Runic Golem and slaughter the heavily injured enemies (or heal the Golem until you’re able to Force Field again — the enemy should no longer have enough stamina for another Slam).

Make sure the mage is standing off to the side as the Runic Golem runs toward the party, because the enemy could see the mage and interrupt the casting with a hurled rock. If you cast the Force Field too late, the enemy will Slam the blocker out of the way, which will probably cause a party wipe.

I really wish I had two mages in this module, which would be able to keep this little trick going forever. Alas, that is not to be.

NOTE: If you didn’t take Storm of the Century Force Field, or if you can’t get the blocking trick to work, there is another way. You need to have respec’ed Jerrik with at least Combat Stealth. Have the party hold position far away from the action, have Jerrik walk into the hallway and trigger the golems. When the golems activate, Stealth immediately and walk away. Using Jerrik, carefully pull the now activated golems, one or two at a time, and kill them individually as they follow you down the hallway. This is arguably easier, if less impressive, than the hallway blockade trick.

The green room

Again, a horde of golems.
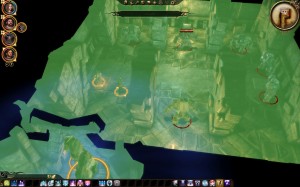
all golems hostile in the golem room
This time, the party needs to flip a switch in the green phase, which triggers an encounter with four boss golems and two elite golems. If you didn’t feel enough hurled rocks and full-bodied rock slams in that previous golem encounter, this one will surely give enough. Even with Brogan the warrior, no one in a level 20 party can tank through that. There is a doorway chokepoint, but boss golems have huge resistances, and even a full Storm of the Century will only take off 1/3 of their hitpoints on Nightmare. The blocker golem won’t survive too long after the Force Field expires; certainly not long enough to get another Force Field up. Once again, they all activate at the same time, so you can’t pull one away by itself…or can you?

This one needs an underhanded trick. Remember, there was a room next to the starting chamber of the Amgarrak level with a blue and a purple switch. Both of these switches will throw the party out-of-phase with the golems, meaning that they disappear from the map. When this happens, the hostility chase trigger is also reset. If you can somehow kite the golems to other rooms, then run to the switch to go into blue or purple phase, walk away while phased out, and then switch back into normal phase when you’re far away enough…these golems will lose sight of you and stand still. Furthermore, now they’re isolated from each other, and you can pull each one independently instead of triggering all six at once! This means you can pull each golem, kill it, heal, and repeat.
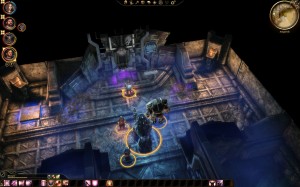
Run back into this room and hit a switch to avoid the chasing golems
So the strategy is as follows: after you hit the green room switch to activate the golems, immediately run back out of the room, down the stairs, and toward the starting chamber. The faster you run, the more the enemy golems aren’t going to keep up, and will be strung out along the way. As you arrive in the switch chamber, switch phase. All the golems disappear as you go out of phase with them.

Walk back to the green room, switch phase again, rob the chests if you need to, and return to normal phase. Slowly go down the stairs again, pull each golem one at a time along the way, kill them one by one until you arrive at the switch room again. Problem solved.

The Final Battle

This is the fight that few people seem to win as a poorly geared level 20. This is because they are going toe-to-toe with the Harvester flesh golem. There are two major problems with this.

  1. The Harvester hits for 90+ damage, and crits for 100+ damage on Brogan or the tank, due to the crappy equipment setup of the stock party. There are not enough healing poultices or spells to keep the tank alive at that rate.
  2. There is a second problem — the Harvester in the Flesh Golem phase periodically summons a skeleton, either with his Vile Disembowelment skill, or they just wander into the room. As the flesh golem takes damage, the skeletons spawn faster. The skeleton is usually elite, which hits really hard, or boss, which can seriously damage even the tank. This isn’t even the main problem — the real problem is that the skeletons go after the DPS’ers. Because Brogan has terrible threat management, the skeletons will wander into the room, go immediately for the caster or the archer, use Riposte to stun them, and hit for 50+ on leather and even higher on cloth. If the mage and/or the golem goes down, it’s a guaranteed wipe.

Since the tank can’t hold up, the only strategy is to kite the Harvester around the room. There is plenty of space to maneuver, but there is not enough DPS with a stock party to take it down quickly enough. Jerrik hits for 80 to 100 per arrow on the Harvester, and crits for a bit higher. The mage hits at around 30 or 40 with the staff and more with spells if not resisted, but she can’t cast too many attack spells as healing is very needed and there are about 10 to 20 lyrium potions in all. The rest of the party is fairly useless in terms of DPS, since they’re melee and can’t get a good hit in on the Harvester as it walks around. The room is going to be filled with skeletons. They all have stun skills. If the kiter take a stun or two, he will get swarmed and probably die.

Preparation

The party needs to set some basic tactics.

  • Brogan needs to take the least powerful health poultice at 25% health or less
  • Jerrik needs to set typical archer tactics, and feign death at health < 10%
  • The PC’s mage needs to drink a least powerful lyrium potion at 25% mana, cast Regeneration on an ally when the ally’s health is < 50%
  • The Runic Golem should turn off his Hurl Rock and Quake tactics, and cast Group Heal when an ally’s health < 50%

Have the Runic Golem set Flame Weapons. When the battle begins, coat weapons with the highest level poison you have available.

Phase One

In Phase One, the Harvester will jump inside a flesh golem and open with a Vile Disembowelment, an area-of-effect attack that immediately spawns a new skeleton.
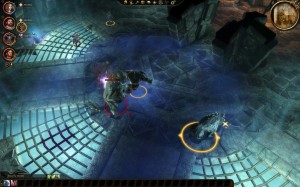
The initial setup against the Harvester

As the fight begins, set the party to Hold Position, and manually move the party members into position. The mage and the archer should go stand by the switch that appears, but far enough apart that they don’t get nailed by the same AOE attack at the same time. Brogan needs to stand close by as the off-tank. The Runic Golem should stand at the center of room with his Cleansing Aura. The bronto (which actually has Taunt and runs faster than any other character in combat) should attack the Harvester, throw down a Taunt, and then start kiting the Harvester around the Runic Golem’s aura radius.

If a normal skeleton appears, Brogan should go tank it immediately, and the mage can help freeze it with a Cone of Cold. If an elite or boss skeleton appears, or if there are more than 3 skeletons, have the mage pull the switch immediately to destroy all the skeletons. Jerrik should always focus on the Harvester. If either the archer or the mage is under attack, have the bronto run over and Taunt, then run the mage and/or archer away. The skeleton should lose interest and focus on the bronto. If not, Brogan needs to pick it up and tank it while the DPS’ers run far away.

Heal the bronto constantly, as it’ll inevitably get hit by the Harvester and its skeletons. If the bronto is stunned, or if it is killed, Brogan must pick up threat and resume kiting immediately until Jerrik is able to resummon the bronto. Switch back once the bronto is up again.

(If this is starting to feel like playing a MMO 5-man dungeon boss encounter, except you have to control every party member by yourself, well…yes. Use that Pause function. The Pause key is the one major difference here that lets you control the multiple things going on in this encounter.)

Keep an eye on the archer and mage while you’re kiting with the bronto. Make sure no skeleton has wandered into the room and started attacking them. Pause a lot if you need to.
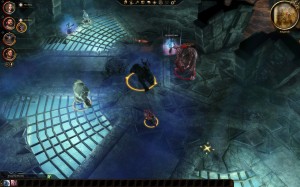
Nearing the end of the First Phase of the Harvester Fight
If this is executed correctly, eventually the Harvester will fall. When its health gets very low, try to avoid hitting the switch and save it for just before Phase Two. The switch will not appear again at that point, and there may be several skeletons that need killing at the end.

There is a bit of luck involved. If the switch is hit too early, and elite skeletons emerge while the switch is inactive, then this is probably bad. If it’s a boss skeleton, you might consider using Brogan to kite it around until the switch is available again. Controlling two kiters is very difficult, so pause a lot.

Phase Two

When the flesh golem is killed, the Harvester will jump out and attack. If the party made it this far, and the switch is still available, then the battle is more or less won. The Harvester lizard-form is far, far weaker than its previous flesh golem body. It hits for about 60 on Brogan, but hits slowly and misses a lot, so it can be tanked. It also disengages a lot to channel a skeleton summoning spell, so it doesn’t have a lot of DPS to hit the party with. The best news: skeletons will no longer wander into the room in large packs — at this point, the Harvester has to summon one with his spell.

When the game screen comes back from the cutscene, hit the switch one last time to clear out all remaining skeletons if it’s still available. If not, resume the kiting strategy and quickly remove the remaining skeletons. Then, have the party resume normal attack stance from hold position and focus fire on the Harvester’s lizard form. If it uses the jump ability, cast Crushing Prison (it won’t resist nearly as much now) or the Runic Golem’s Slam attack to slow it down while the melee attackers catch up. It can also be frozen solid with Cone of Cold, though it can’t be shattered obviously. Jerrik and the mage are still going to be the main DPS. If the Harvester finishes channeling a normal or elite skeleton, tank it with Brogan and blast it down quickly. If it’s a boss skeleton, Force Field it or have the bronto kite it around the room while the remaining party members continue to blast the Harvester. It is only a matter of time before the Harvester dies.

The Grim Reaper achievement should hit the screen after a short cutscene. Woot!

The first time I did this, it took me three tries and about an hour of playing, but is definitely a reproducible strategy on Nightmare difficulty. If playing on Hard, this is actually really easy, as most skeletons will be normal skeletons and can be frozen and shattered. It does take a lot of micromanagement, but since you can pause the game and issue new orders, this management shouldn’t be too hard — kinds of reminds of me Baldur’s Gate 1, where I auto-paused after every combat round and barely took any damage.

As a final word: the builds and strategies outlined in this note are *not* how you should typically play DAO. Given an entire campaign to work with, the builds here are suboptimal. These builds are designed only to complete this specific module, within the constraints that it imposes.
Romance of the Three Kingdoms XI game event stills

In Koei’s Romance of the Three Kingdoms XI for Windows PC (non PUK, English edition), there are a total of 30 event stills ( basically, pictures of important events during a campaign, viewable under Settings -> Reference -> View Event Stills ). Upon collecting all 30 and winning any scenario to unite China, you will unlock top-tier skill sets and all historical portraits when you use Create Officer for your own custom officers. It’s one of the things required for One Hundred Percent Completion of the game. However, there has not been a very good guide as to how to achieve all 30 events, especially with problematic and rare ones like Secret Meeting.

This post is my attempt to catalog all the event stills and how to obtain them in game. The events are listed below in order of their appearance on the View Event Stills page. In general, you only need to view the Event Still once. That means that you can start a game, obtain the Events you want, without actually completing or even saving the game once. Even if you abandon that game later, once you’ve viewed the event, it counts toward your completion of collecting all 30.

Note that I will not suggest any unreasonably contrived means to get events, even if that might be faster, because I consider these tactics basically cheating. For example, I will not suggest that you send your sovereign out to die deliberately to get the Sovereign Death event, even if you might be able to do that. You may also create officers with birth and death dates to your exact specification, to achieve some of these events, but that, too, is basically cheating. Most of the fun in these events is trying to obtain them fairly while playing a game — it adds an additional dimension of strategic planning. If you’re just going to cheat, stop reading this and go download the fully unlocked sysfile that’s floating around the Web.

Page 1

  • Plague – when a city receives a Plague event, causing all sorts of havoc. You will likely get at least one in any scenario.
  • Locusts – when a city receives a Locusts event, decreasing food production in that city. You will likely get at least one in any scenario.
  • Plenty – when a city receives a Plenty event during harvest season, increasing food production in that city. You will likely get at least one in any scenario.
  • Bandits – when bandits appear in your territories, as the name suggests. The easiest way to obtain this still is to start the Yellow Turban Rebellion scenario. During the story intro sequence, the Yellow Turbans will rise against the Han court, and this will unlock the event still.
  • Coronation – when an Emperor is crowned, or when you declare support for the Emperor after capturing the capital (Luoyang, Chang’an, or Xu Chang, depending on the scenario). Easily achievable in most scenarios if you’re winning.
  • Unity: Male – when you unite China under a male sovereign. This event will be unlocked when you win a scenario with a male sovereign. I prefer Liu Bei, but YMMV 🙂
  • Unity: Femalenotes not yet available
  • Downfall – when one of the forces in the game is eliminated. At least one ruler will fall in any game, so this is trivial to obtain. You can also get this by losing your city in Tutorial 3, Going into Battle.
  • Independence – when a prefect or viceroy declares independence and forms his or her own force in a game. In Tutorial 6, Capturing Cheng Du, there is a good chance that Jian Ning will declare independence under the prefect Yong Kai, but it is not guaranteed. In the 190 scenario, the free cities in Jiangdong may declare independence under their prefects within the first two years. In any scenario, foment an independence movement in an enemy city via the strategy Collaborate. Alternatively, wait until one of your district viceroys’ or city prefects’ loyalty falls below a certain threshold, at which point an AI force is likely to foment a revolt in that prefecture or district. Finally, when you’re winning a full scenario, at the very end of the game one of your officers will ask you to investigate another officer for treason. If you choose to do so, that officer will be proven innocent, but will revolt anyway due to your distrust of him. This revolt will trigger an Independence event.
  • Omen – This event is displayed at the start of the year, when your strategist warns that one of your officers is about to die (of natural causes, not in battle). If you play through a game with historical age settings, quite a few of your officers will die. Pick a middle scenario, when there are a lot of older officers around.
  • Sovereign Death – when your own sovereign dies of natural causes. The easiest way to get this one, short of deliberate regicide on your part, is to use Tao Qian in 194, Rival Warlords. He will most likely die within the next two years, giving you this event.

Page 2

  • Officer Death : Male – When one of your male officers die. This is relatively trivial to get – one will come within the year, after an Omen, for example. Your officer may also be killed by a cavalry charge or in a duel, if officer deaths are on.
  • Officer Death : Female – When one of your female officers die. This is a little more annoying, given the sparsity of female officers. Still, at least one should die in any game. Your officer may also be killed by a cavalry charge or in a duel.
  • Funeral – When any sovereign (except yours) dies of natural causes — that is, of illness or old age, not in battle. In the 194 scenarios, Tao Qian will die within the next two years. Play the scenario as a ruler other than him, and you will trigger this event still.
  • 2 Sworn Brothers – when you arrange for two male officers to swear brotherhood with each other. Officers with sworn brothers on the same force will not defect, and will obtain bonuses when both are assigned to the same unit. You’ll need two officers of the male gender and at least 500 in Deeds each. You will also need 500 technique points (TPs). At that point, Sovereign -> Mediate will allow you to mediate sworn brotherhood between these two officers and unlock this event.
  • 2 Sworn Sisters – when you arrange for two female officers to swear sisterhood with each other. Officers with sworn sisters on the same force will not defect, and will obtain bonuses when both are assigned to the same unit. You’ll need two officers of the female persuasion and at least 500 in Deeds each. You will also need 500 technique points (TPs). At that point, Sovereign -> Mediate will allow you to mediate sworn sisterhood between these two officers and unlock this event.
  • Male Officer Appears – Triggers at the start of a new year, when a male officer (who is related to one of your current officers) arrives to offer his services to your ruler. For example, as Liu Bei in 211 Liu Bei in Shu scenario, you will likely receive Zhang Bao – Zhang Fei’s son, in 212. Note that your sovereign should be within a city for this event to occur.
  • Marriage – when you marry one of your officers to another – married officers will not defect, and obtain bonuses when assigned to the same unit. You’ll need two officers of opposite gender, at least 500 in Deeds, and unmarried status. You will also need as 500 technique points (TPs). At that point, Sovereign -> Mediate will allow you to conduct a marriage between these officers and unlock this event.
  • Fem. Officer Appears – Triggers at the start of a new year, when a female officer (who is related to one of your current officers) arrives to offer her services to your ruler. This one is fairly tricky, because there aren’t that many female officers. In general, play one of the middle scenarios as a prominent family. For example, if you play as Sun Quan in 211, you will get a female officer from the Sun family in 215.
  • Resignation – when an officer resigns from your force due to low loyalty. This is also a hard one to get if you are a decent player, since you’d never let an officer’s loyalty drop low enough. Note that if your sovereign dies and your officers resign, you will not receive this event still. You must have this officer resign through low loyalty. Officers with loyalty less than 70 will tend to resign, and they usually do so on Jan of a new year. Best way to do this may be to play as Dong Zhuo in 190. Use your overwhelming starting forces to take down Cao Cao, then hire his wife Bian Shi. Use Bian Shi to hire Cao Cao. Dong Zhuo and Cao Cao are disliked officers, so Cao Cao’s loyalty will start in the 70s and drop fast. However, since you have his wife in your service, he will not be hired away by another sovereign. At the start of the next year, Cao Cao will most likely resign from your force.
  • Decree – when an imperial decree arrives. For example, when the Emperor promotes your sovereign to the rank of Duke, he will use this kind of decree. Since to win a game, you’ll likely surpass the rank of Duke, this event is trivial to unlock if you win a game.
  • Orders – when a different type of imperial order arrives. If you start 190 Cao Cao's Ascent, the story intro sequence to the scenario involves Cao Cao’s forged imperial edict arriving at Yuan Shao’s city. This will grant you the event still.

Page 3

  • Fallen Castle – when a city falls to your forces. You are likely to receive this in Tutorial 6, Capturing Cheng Du…when you capture Cheng Du. Otherwise, take any city or base, and the event is yours. Trivial.
  • Conversation – when one of your civil officers head off to search for a friend in the area and obtains his or her services after a debate. This seems to occur randomly, when your sovereign is in the same city as certain civil officers on his force. It is the analogous event to “Search”, which applies only to military (high WAR) officers. The event represents the “conversation” between your officer and his friend. This obviously only triggers when there are hidden officers to find in a city — so start an early scenario with lots of hidden officers for a better shot at the event.
  • Coalition – pick up this event when the coalition against Dong Zhuo forms in 190 Cao Cao's Ascent, at the very beginning during the story intro sequence. Otherwise, play as a strong army (say, Cao Cao in 207), and eventually two of your weaker enemies will merge to form a coalition against you.
  • Search – when one of your military officers head off to search for a famous hero in the area and obtains his or her services after a duel. This seems to occur either randomly or scripted to resemble randomness. This obviously only triggers when there are hidden officers to find in a city — so start an early scenario with lots of hidden officers for a better shot at the event. The 190 scenario with Cao Cao in Xu Chang or Chen Liu should be an easy way to get this event, as you recruit various notables like Dian Wei or Xu Chu.
  • Secret Meeting – when you meet a hidden character for a philosophical discussion. This one is ridiculously obscure and difficult to obtain, to the effect that many people do not know how to obtain it. Forum posts and such suggest that you’d receive this when the AI foments unrest with one of your viceroys or prefects (one of the in-game log messages say “your prefect blah is meeting someone secretly”. However, that is a red herring. One post correctly identifies that the Secret Meeting event is awarded for meeting a hidden character such as Xu Shao during a Search. As Cao Cao in 190 Cao Cao's Ascent, if you keep Searching the area around Chen Liu or Ru Nan, against your strategist’s advice that nothing would be found, you will eventually encounter Xu Shao, who will do a physiogamy reading for you, unlocking this event. One of the early scenarios, such as Rise of Dong Zhuo, is preferred for obtaining this event. Just keep Searching your city, a lot, and fruitlessly most of the time. You’ll get this eventually ( took me under two game years of on-and-off searching in Chen Liu while holding off Dong Zhuo’s army ). A comment from Lance Lidner reports that using Kong Zhou in Rise of Dong Zhuo works best, as Xu Shao appears in Ru Nan at that time. Kong Zhou is also out of immediate reach from most hostile factions in that scenario, so you can afford to take your time.
  • Appoint – when the emperor issues a new title to you. This occurs when you’ve captured enough cities to reach the next rank, and that your sovereign is currently in a city (as opposed to being on campaign). As Liu Bei in the 211 Liu Bei in Shu scenario, taking Xiang Yang (via Jiang Ling – you’ve got Zhuge Liang, Pang Tong, Zhang Fei, Liu Bei, Sun Shang Xiang, Zhao Yun … that’s plenty to take the city from Cao Ren early on) and Yong An will bump you up to Field Marshal, and Emperor Xian will award you the title and this event. As Cao Cao in 190 Cao Cao's Ascent, taking the free cities of Xu Chang and Xin Ye will grant the title of Lt. Governor, which once again easily unlocks this event.
  • 3 Sworn Brothers – when you arrange for three male officers to swear brotherhood, much like the historical Oath of the Peach Garden of Liu Bei, Guan Yu, and Zhang Fei. Officers with sworn brothers on the same force will not defect, and will obtain bonuses when two or more are assigned to the same unit. You’ll need three officers of the male gender and at least 500 in Deeds each. You will also need 500 technique points (TPs). At that point, Sovereign -> Mediate will allow you to mediate sworn brotherhood between these officers and unlock this event.
  • 3 Sworn Sisters – when you arrange for three female officers to swear sisterhood. Officers with sworn sisters on the same force will not defect, and will obtain bonuses when two or more are assigned to the same unit. You’ll need three officers of the female persuasion and at least 500 in Deeds each. You will also need 500 technique points (TPs). At that point, Sovereign -> Mediate will allow you to mediate sworn sisterhood between these officers and unlock this event. The hardest part of this is rounding up 3 female officers to begin with.

Processing monitoring and Settlers of Catan save failure

process monitor finding Catan issues
Some versions of Bigfish Games’ Settlers of Catan (a faithful reproduction of the board game) have a strange issue, in which under certain operating contexts, it will not save a game. The error message reported is a generic and not-at-all useful ” an error has occurred while saving “. I suspected this was due to the fact that it failed to create a savegame directory, and indeed, a bit of sleuthing indicates that on Windows XP, the directory at C:\Documents and Settings\All Users\Application Data\Microsoft\MSN Games\Catan is missing (obviously on Vista, this would be somewhere else – probably C:\Users\…). Instead of creating this directory, Catan simply fails to save the game. The program runs fine otherwise.

Of course, it was not obvious where Catan was trying to save its games – finding out that missing directory was the culprit took a bit of investigation. I took a wild stab at the start by creating a “save” directory in its own program files directory. No such luck. Time to bring out the big guns.

A number of ways could have been used, but one is to use the awesome Sysinternals tool Process Monitor, or Procmon.exe. It tracks events and calls from a process, such as filesystem accesses, and has advanced filtering capability to organize and show only the events of interest to a debugging human.

With ProcMon, I simply filtered on the Catan process and tried to save a game as foo. Then, viewing the event log (screenshot 1), it was obvious that CreateFile calls to create foo.sav failed, with the exact target path specified. A quick Windows Explorer excursion confirms that the path does not exist. Creating that directory, of course, solved the savegame problem.

The moral of the story is that ProcMon is a fine tool for tracking mysterious interactions between an application and a system. For something like failing to make a saved game (in this narrow gamig context) or various system-related errors in general (especially when you lack the source code to debug in depth), it sometimes pays to examine the exact sequence of calls and events that led up to the failure. The solution could be very trivial, if you only knew what and where things failed.

Baldur’s Gate 1 graphics glitch and disabling NVidia hardware acceleration

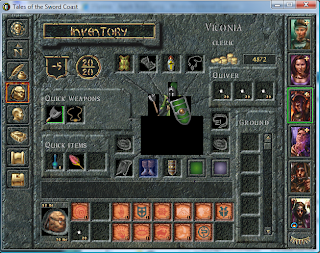
If you have a series 8 NVidia graphics card (say, an 8600M GT) with current drivers (as of the time of this post, of course), you’re likely to see graphics glitches (screenshot 1) in Baldur’s Gate 1. One workaround is to use 16-bit color and software transparent BLT. Another strategy, if your CPU is powerful enough to shoulder some 2D graphics work, is to temporarily turn off hardware acceleration for DirectDraw and avoid the bug entirely. black boxes in Baldur's Gate under Nvidia 2D acceleration

However, disabling hardware acceleration under Vista is apparently easier said than done. Instead of using the Personalization -> Display Settings control panel (as one might think to do based on Windows XP experience), the correct solution is to use the DirectX SDK and dxcpl.exe, the DirectX Control Panel (located within the SDK distribution under Utilities\bin\[cpu_arch]\. From within this control panel, pick DirectDraw on the upper tab bar. Amongst the various configuration options available on that tab, the only one you care about is the box to turn on or turn off hardware acceleration. Turn that off (temporarily, of course) and you’re good to go.

The Context

Baldur’s Gate 1 performs surprisingly well under Windows Vista, despite being a venerable (some might say, ‘ancient’) 10-year old RPG. Unfortunately it’s plagued by a number of graphics glitches when running on NVidia cards. In essence, a number of items and sprites (items on the belt, the timepiece to the lower left corner, birds flying overhead, for example) will be surrounded by black outlines. Further, on your character paper doll in the Inventory screen, giant black boxes obscure much of the figure. In some cases, the ‘fog of war’ on the unexplored regions of a map will be rectangular black boxes, rather than the ‘foggy’ darkness you’re used to. These glitches are widely experienced.

For this very annoying problem, two workarounds are available.

1. Trade color depth for correctness

The prevalent strategy, as noted in a forum post at Spellhold Studios, is to switch on Software Transparent BLT and use 16-bit color depth. This apparently routes around whatever strange bug NVidia managed to introduce in their graphics acceleration layer.

This method works just fine, but was not ideal for me. The game runs at 640 x 480, and is already quite pixelated when scaled up to full screen. 16-bit vs 32-bit color is somewhat noticeable, once at that scale.

2. Trade performance for correctness

Here’s another classic trade-off. Since the problem is obviously arising from the DirectX layer and its interaction with NVidia graphics hardware (boot into safe mode and run BG1 to verify this), another solution is to just kick NVidia out of the loop by disabling hardware acceleration for DirectDraw. This is feasible if you’re doing this on a fast machine (and if you’re using a series-8 card in that box, I’d assume it’s pretty fast anyway) – after all, BG1 is a 10-year old game. Your Core 2 Duo or quad-core Xeon can use some exercise anyway.

Of Hardware Acceleration Controls

In the glory days of XP, this simply meant right-click on Desktop -> Properties -> Settings -> Advanced -> Troubleshoot -> Hardware Acceleration slider (dear god that’s convoluted). In Vista, the analogous experience is right-click on Desktop -> Personalize -> Display Settings -> Advanced Settings -> Troubleshoot -> Change Settings (I see you still haven’t hired a good user experience designer, Microsoft).

The problem now is that if you try this with your NVidia card and Vista, you’ll just be staring at a disabled ‘Change Settings’ button and a terse message: 'Your current display driver does not allow changes to be made to hardware acceleration settings.' If you also try the old standby dxdiag, you might be surprised to know that the Disable buttons have been removed from the DirectX Features box on the Display tab. Thanks, NVidia and Microsoft. Apparently they really don’t want us changing these settings.

But we don’t really want to change much – just the DirectX technologies, and in fact, just the 2D-based DirectDraw (since 3D is more or less irrelevant for BG1), and only for a short while. Enter the DirectX SDK.

The SDK is meant for developing and debugging DirectX-based programs, but it comes with a fair suite of nifty utilities, one of which being the DirectX Control Panel: dxcpl.exe. Download the 400+ MB SDK (this is the 2008 version of the SDK — you might look for a newer version if you’re on Win 7; I think the control panel still ships with the latest versions) and grab the control panel in Utilities\bin (starting from where you installed the SDK to). Make sure that if you are on x64 (x86_64) that you also use the x86 architecture control panel for BG1, as it seems to be required to affect 32-bit mode apps (see comments for this post for more details).

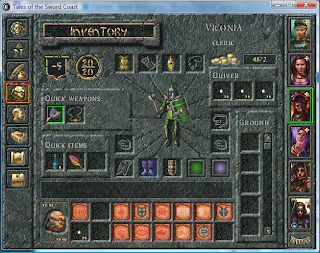
In the control panel, use the DirectDraw tab – in the set of checkboxes, uncheck the “Use Hardware Acceleration” box. Fire up BG1 and see the non-black-boxed goodness of 1998 graphics (screenshot 2).
Baldur's Gate playing normally after disabling Nvidia-accelerated DirectDraw
If you were disabling acceleration for another reason, this control panel should work for you too – pick the appropriate tab and have at it. Do not forget to turn acceleration back on after the session. You probably do not want unaccelerated graphics performance in your normal, non-glitchy apps.

Turning off hardware accelerated DirectDraw avoids the BG1 black-box bug. You’ll have to assess for yourself which is more expendable: color depth (trivial to change directly from BG1’s Options configuration) or graphics performance (more difficult to tweak, but perhaps compensated by CPU performance).

DirectX SDK vs Settings slider

In any case, the DirectX control panel is a somewhat useful trick to know in general, especially when faced with Vista’s obstinate insistence on not letting you change graphics acceleration settings. The control panel provides all the functionality that the old XP Settings slider would have give you – except in a much more technical interface. In fact, the old slider more or less tweaked settings in the Direct3D and DirectDraw tabs, except in a coarse-grained, all-or-nothing kind of way. Here at least you have fine-grained control on most of the detailed options in each panel.

Still, such a pain.

Know that tweaking these settings are done at your own risk (NVidia and MS obviously are against it), and may or may not work at all depending on your setup, your driver version, and pure luck. On the plus side, if you ever need to write some DirectX apps, the SDK is now just a few clicks and SDK path text fields away from Visual Studio 2005/2008, so the 400 MB bandwidth and disk space isn’t completely wasted. Hopefully.

UPDATE 9/8/2008
It’s come to my attention that some people still have problems after applying this fix – namely, there are cursor trails on menu screens. I cannot reproduce this issue locally on my 8600M GT, but it’s possible that there are new problems introduced with newer series-8 cards and drivers. If this is the case, I’d recommend using the first workaround — that is, using Software BLT and 16-bit color, rather than the DirectDraw workaround.

UPDATE 7/15/2009
There is now a Nvidia driver .dll patcher available for BG1-era Infinity Engine games at Spellhold Studios. They also explain what the underlying issue is and what the DLL wrapper does to work around the bug. I have not personally tested this fix. It does install a new graphics DLL that overrides existing calls, so it is theoretically possible that it may introduce other issues, but I am told by others that it works quite well. Check it out — it saves you a lot of trouble of ticking DirectDraw boxes on and off, if you don’t mind unofficial DLL patching.

UPDATE 2015
There are still people arriving at this page, 7 years later after the initial post. At this point, you should probably just buy the remastered Baldur’s Gate Enhanced Edition on Steam instead. Much, much less hassle.

Hacking HoMM IV saved game


For the five of you who have a copy of Heroes of Might and Magic IV, Mac edition (and still play it on occasion), here’s something you might not know.

The .h4s saved game files are gzipped data files, with what appears to be a straight-up serialized form of in-memory data structures representing your heroes, their stats, creatures, etc. The implication is, then, this guide to in-memory editing on the PC edition also applies (mostly) to the saved games on the Mac.

There is a bug in Campaign mode, where certain skills are never offered to your heroes even when they are able to receive them natively. For example, if you played on the Might campaign, even if you hired a Mage from the external tavern (say, on Map 2), you will never be offered Life Magic or Death Magic for this mage at level-up time, even though these skills are within the allowable set for Mages. Instead, your Mage will actually get offered Nature Magic, Tactics, etc, which aren’t normally in the set of offerable skills. A Cleric would never be offered Order Magic, etc. It appears that campaign skill restrictions on your primary hero are also inadvertently applied to secondary carry-over heroes.

Since 3DO is dead, I don’t expect this to ever be patched. To workaround this bug, however, you can edit the saved games yourself.

You’ll first need to gunzip the saved game. The incantation is gunzip -S .h4s foo.h4s.

With a hex editor, find your hero’s name. There may be several instances of it, but the correct one has your hero’s description following. If you’ve done this correctly, you should see a block of hexes consisting of bytes such as FF FF FF FF, 00 00 00 00, etc. Each 4-byte signed integer represent one of your hero’s skills. They are, in order:

tactics, combat, scouting, nobility,
life, order, death, chaos,
nature, offense, defense, leadership,
melee, archery, resistance, pathfinding,
ships, stealth, estate, mining,
diplomacy, heal, spirituality, resurrection,
enchantment, wizardry, charm, occult,
daemonology, necromancy, conjuration, pyromancy,
sorcery, herbalism, meditation, summoning

The skills are represented by signed, 4-byte integers. On big-endian PowerPC machines, this would be:

FF FF FF FF == -1 == no skill
00 00 00 00 == 0 == basic
00 00 00 01 == 1 == advanced
00 00 00 02 == 2 == expert
00 00 00 03 == 3 == master
00 00 00 04 == 4 == grandmaster

Hypothetically, an Intel version would be little-endian. Since there isn’t HoMM IV Mac edition for Intel processors (not Universal binary, and not likely ever to be), however, the issue is kind of moot.

Change the various skill levels as you wish. I use this to workaround the aforementioned skills bug, so I decrement one skill and then take up the one I should have gotten, but you can also, of course, cheat like mad.

There are other values around that I haven’t really played with, but all the values are in here, including your amount of gold, resources, etc. One easy way to find them is to convert their values (well, if they’re reasonably unique values) to hex and search the file.

Once you’re done, don’t forget to use gzip to zip the file back up into a .h4s file and plop it back into your games directory. Fire up HoMM IV, and you’re ready to go.

Update
check out the comment section for additional notes on other data values