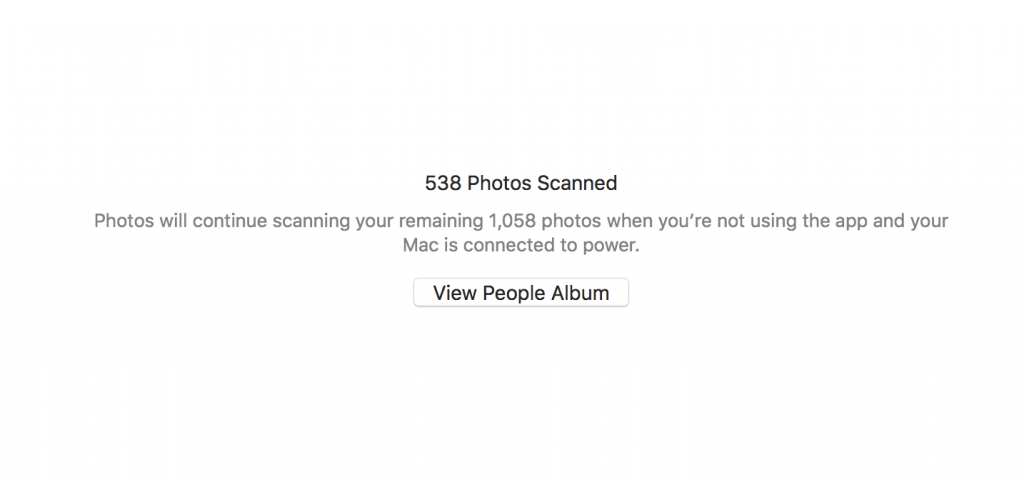
check progress of photoanalysisd

If you’ve just installed Mac OS Sierra and now see photoanalysisd sucking 100% to 200% CPU power, this process is doing some kind of face detection + object / image recognition / indexing on your Photos library.

photoanalysisd progress

Open Photos.app, select People on the left sidebar, and see how far it’s gotten in this task. If you have a very large Photos library, this might take a while.

As a bonus, while Photos.app is open, photoanalysisd is suspended, allowing your laptop fans a bit of a rest.

It’s all for a good cause. After indexing, you’d be able to type “ocean” in the search box and get all your photos with the ocean in it, without having to tediously tag all your photos yourself. Magical, huh? ( Not really. If this is doing what I think it’s doing, well, it’s the kind of problem computer vision researchers have been tackling – and solving – for years already.).

As an aside, for consumer-grade apps like Photos, arguments have been made to do computationally intensive image analysis in The Cloud(tm) instead of on client machines. The tradeoff is fairly obvious. In exchange for the privacy benefit of Apple not uploading color histograms of all your photos to its own cloud servers (something I’m sure Google wouldn’t bat an eyelash at doing), you’ll have to pay the cost of doing this analysis yourself, with your own measly consumer/mobile-grade CPUs (which isn’t ideal if you want to get work done at the same time that this analysis is going on). Overall, the user experience probably could have been handled better, especially given the extensive public beta period that Sierra received. The current opaque process violates some core UX principles: giving users (at least the feeling of) control, and giving the user clear reasons to trust in the importance of the task being performed. Apple should have known that eating 100% CPU while people are actively working with their machines is immediately noticeable, and should have 1) let the user know that image analysis is about to happen, and 2) given them the option of choosing when and how much CPU to devote to this task.

Setting up OpenSSH Server on Windows 10 Anniversary Update

UPDATE 2017-12-22

Microsoft now ships a real SSH server (and client!) with Windows Fall Creators Update, no Cygwin or Linux subsystem required. Finally.

This post remains for historical context only.

Microsoft has finally landed its anniversary update for Windows 10. Among all the random useless features, is an actual Ubuntu Linux subsystem within Windows, with the ridiculously silly name “Bash on Ubuntu on Windows”. Goodbye Cygwin?

One of the first things I wanted to try was to setup the SSH server, so I can remote-login from my real box. Getting one up was actually fairly easy, if you can deal with a few problems with weird, weird red-herring error messages.

The problem

To recap, installing the OpenSSH server is as easy as popping open a bash shell (I assume you figured out how to get the Linux subsystem installed already and popped open Ubuntu )

sudo apt-get install openssh-server

If you try to now start the server with

sudo service ssh start

It’ll respond with

initctl: Unable to connect to Upstart: Failed to connect to socket /com/ubuntu/upstart: Connection refused

but subsequently

Starting OpenBSD Secure Shell server sshd [OK]

When you now try to connect in from a remote host, there are two outcomes:

  1. There is no SSH server on port 22.
  2. There is an SSH server on port 22, but it responds only to your Windows password and not your Ubuntu Linux user password. If login is successful, it drops you into a DOS prompt instead of a bash prompt. Trying to run bash within the prompt generates a response:
    "Error: 0x80070005".

Diagnosis

There are multiple underlying problems here.

  1. First, it’s important to note that there exists a separate Windows SSH server (separate from the OpenSSH server from the Ubuntu subsystem installation) now on port 22. If you telnet (yes, telnet) into port 22, and the host greeting is SSH-2.0-MS_1.100, you’ve run into the Microsoft SSH implementation (hence the MS part in the greeting).

    I’m not sure what this server is supposed to do (and, in fact, starting SSH servers on standard ports without explicitly telling the user seems like a potential security problem to me, in addition to being kind of jerk-ish). I do know it is launched when you reboot with Developer Mode on. You know, Developer Mode, the mode you have to turn on to run Bash on Ubuntu on Windows. This server is occupying port 22, so you cannot launch another SSH server to listen on this port. This is the problem that is causing the silent failure of sshd to start up, not a broken Upstart or any of that nonsense the error message being displayed is referring to.

  2. Apparently the Ubuntu compatibility layer on Windows does not implement chroot or one of the related system calls needed for OpenSSH privilege separation at the time of this post.
  3. If you launched bash from DOS cmd.exe, instead of the Bash on Ubuntu on Windows shortcut, /mnt/c/Users/[Windows Username] (the directory you start with in DOS) is not your Linux home directory. .ssh config files left in this directory will not configure your OpenSSH server.

Symptoms & Solutions

  1. To resolve the problem of conflicting SSH servers, set your OpenSSH server on a different port : one other than 22. This can be done by editing /etc/ssh/sshd_config and changing the Port configuration. Be sure to open this new port in your Windows Firewall for inbound connections, as this firewall configuration will not be automatically done for you. I set mine to 60022.
  2. To enable login, also change UsePrivilegeSeparation in the same config file to No. Failure to do so will cause the server to respond with Connection reset by nnn.nnn.nnn.nnn
  3. To enable public key auth and set other configurations, the Linux subsystem home directory is, as in normal Ubuntu, /home/<yourname>.

Having done this, now you can start or restart in the bash shell

sudo service ssh restart

And connect from remote host with your Ubuntu user credentials and/or public key:
$ ssh -p 60022 10.0.1.208
...
Welcome to Ubuntu 14.04.5 LTS (GNU/Linux 3.4.0+ x86_64)

(And if you telnet, the host message should be something like
SSH-2.0-OpenSSH_6.6.1p1 Ubuntu-2ubuntu2.7
)

Not paying OnTheHub to redownload Windows ISOs

If you’re looking to re-download Microsoft Windows 10 Education edition ISOs and have a valid key from the university licensing program already, grab the education edition ISO images directly from Microsoft instead of paying OnTheHub/Kivuto protection money.

Context

UC Berkeley, like many other universities, has a volume licensing deal with Microsoft for its operating system products. In particular, it offers free downloads of Windows 10 Education edition to all current students.

The irritating thing about this is that they offer this deal through a shady vendor called OnTheHub or Kivuto. Instead of allowing the ability to re-download the ISO image, it holds you hostage if you want to access the image file again after 60 days.

When you first download, it offers you a discounted “extended access guarantee”:

To ensure that your download and/or key(s) remain accessible to you, you can extend your coverage to 24 months with the Extended Access Guarantee for $4.95. With this service, Kivuto will back up your download and/or key(s) on their servers, allowing you to access this information at any time under the “Your Account” section of the WebStore.

If you declined to take advantage of this oh-so-generous offer, and find yourself needing the ISO again after 60 days:

Access Guarantee Retrieval (60 days)
Purchase this service if you wish to recover your download(s) and/or key(s) after access has expired.
You will gain another 60 days of access to any expired product in your order.Learn more
$11.95

In my case, I backed up the wrong ISO — the generic install ISO, instead of the education edition ISO. The product key Kivuto issues you is for the Education edition, so the generic ISO you can get online won’t let you install with the key. It’ll report an error of “The product key entered does not match any of the Windows images” at install time.

So when it came time to reinstall, suddenly I’m faced with the OnTheHub protection racket.

Solution

For Windows 10, at least, you don’t have to pay the protection money. Education edition ISOs are available directly from Microsoft after product key verification. The download page is rather well-hidden, under the “more options” link from the software download page.

Unsurprisingly, OnTheHub makes no mention of this download source.

I wonder how much money OnTheHub makes off people who didn’t realize there was a free, official source for Windows 10 ISO images. Bandwidth costs money, sure, but you are a *education software download vendor* in 2015, with a target market of underpaid students and faculty. Nickel-and-diming poor student users for software downloads, in this era of cloud-driven computing, is an obsolete and despicable business practice.

Python multiprocessing code crashes on OS X under IPython

While working on a project on OS X 10.10.4 Yosemite, some innocuous Python 2.7.6 code using the multiprocessing module (via the concurrent.futures module) was crashing when run from the IPython interpreter, but works just fine when executed via shell directly.

Issue

Some nice simple test code. It pulls some data from two Web servers, via the requests module, concurrently using a multi-process worker pool.

from multiprocessing import Pool
import concurrent.futures
import requests

TEST_URI = ["http://example.com", "http://yimingliu.com"]

def http_get(uri):
    return requests.get(uri)

def test():
    p = Pool(5)
    print(p.map(http_get, TEST_URI))

def futures_test():
    with concurrent.futures.ProcessPoolExecutor() as executor:
        print [response for response in executor.map(http_get, TEST_URI)]

if __name__ == '__main__':
    test()

When run as $ python mp_test.py, everything works beautifully. When test() or futures_test() was called from an IPython shell however, a segmentation fault occurs:

Exception Type:        EXC_BAD_ACCESS (SIGSEGV)
Exception Codes:       KERN_INVALID_ADDRESS at 0x0000000000000110

...

Application Specific Information:
crashed on child side of fork pre-exec

Thread 0 Crashed:: Dispatch queue: com.apple.main-thread
0   libdispatch.dylib             	0x00007fff9772c16f _dispatch_async_f_slow + 395
1   com.apple.CoreFoundation      	0x00007fff92e91541 _CFPrefsWithDaemonConnection + 305
2   com.apple.CoreFoundation      	0x00007fff92e60ac6 __80-[CFPrefsSearchListSource generationCountFromListOfSources:count:allowFetching:]_block_invoke + 150
3   com.apple.CoreFoundation      	0x00007fff92e609d2 -[CFPrefsSearchListSource generationCountFromListOfSources:count:allowFetching:] + 258
4   com.apple.CoreFoundation      	0x00007fff92d1cea5 -[CFPrefsSearchListSource alreadylocked_copyDictionary] + 133
5   com.apple.CoreFoundation      	0x00007fff92d17dba -[CFPrefsSearchListSource alreadylocked_copyValueForKey:] + 42
6   com.apple.CoreFoundation      	0x00007fff92e9211c ___CFPreferencesCopyAppValueWithContainer_block_invoke + 60
7   com.apple.CoreFoundation      	0x00007fff92e5f979 +[CFPrefsSearchListSource withSearchListForIdentifier:container:perform:] + 729
8   com.apple.CoreFoundation      	0x00007fff92e92097 _CFPreferencesCopyAppValueWithContainer + 183
9   com.apple.SystemConfiguration 	0x00007fff96be8db4 SCDynamicStoreCopyProxiesWithOptions + 153
10  _scproxy.so                   	0x000000010e07f915 0x10e07f000 + 2325
11  org.python.python             	0x000000010d89a9ed PyEval_EvalFrameEx + 14935
12  org.python.python             	0x000000010d89d60e 0x10d813000 + 566798
...

The same code works just fine under Ubuntu Linux, from IPython or otherwise.

Workaround

It turns out that there is some kind of edge case bug going on between IPython, multiprocessing, and OS X. Namely, a segfault seems to trigger from within OS X’s Grand Central Dispatch architecture, when multiprocessing is forking a new process to access the network, under IPython.

Note these lines in the crash log:

0   libdispatch.dylib             	0x00007fff9772c16f _dispatch_async_f_slow + 395
...
10  _scproxy.so                   	0x000000010e07f915 0x10e07f000 + 2325

Something in _scproxy.so (a part of Python’s lib-dynload) is not happy with libdispatch.

_scproxy.so calls out to OS X’s SystemConfiguration framework for network proxy information. The quickest workaround for this bug, then, is to disable this proxy check. IPython seems to respect the customary no_proxy rule to skip proxy checks (at least IPython 4 does), so:

$ env no_proxy='*' ipython

and then

$ env no_proxy='*' ipython
Python 2.7.6 (default, Sep  9 2014, 15:04:36) 
Type "copyright", "credits" or "license" for more information.

IPython 4.0.0-b1 -- An enhanced Interactive Python.
?         -> Introduction and overview of IPython's features.
%quickref -> Quick reference.
help      -> Python's own help system.
object?   -> Details about 'object', use 'object??' for extra details.

In [1]: import mp_test

In [2]: mp_test.test()
[<Response [200]>, <Response [200]>]

works just fine. No segfault.

Of course if you actually need this proxy functionality, you would be out of luck.

Setting up a Gmail POP3 account for Mail.app on 10.10.3 beta

The last beta of OS X has apparently removed the option to create POP3-type email accounts for Gmail in Mail.app. When you type in a Gmail account, IMAP is setup automatically. Presumably because OAuth doesn’t work all that well with it.

There (currently) is a workaround.

  • Turn off/unplug your Internet connection. This will force Mail to not verify the settings that you are giving it.
  • Open Mail.app -> File Menu -> Preferences -> Accounts tab
  • Hit the + button to Add Other Mail Account
  • In the email address field in the following box, enter something that IS NOT @gmail.com. Enter some random email.
  • Mail.app will now inform you that manual setup is required. That’s exactly what we wanted in the first place, thank you very much. In the next screen, you will get to pick IMAP vs POP. Pick the POP tab and enter the correct Gmail POP server information and Gmail outbound SMTP server in the following screens, for your account. Make sure to use SSL and port 995 if appropriate
  • Use the application-specific password in the password field if you have two-factor auth setup.
  • Once setup is complete and you are thrown back into the preference pane, change the “Email Address” field back to the correct email address @gmail.com
  • Under “Advanced”, untick “automatically detect and maintain account settings”
  • Quit Mail.app. Turn Internet connection back on
  • When you re-open mail.app, the POP account should be operational

Hooray for we remaining holdouts, still using obsolete and dubiously secure technology. Because when I want mail on my local machine, I mean I want mail on my local machine, The Cloud(tm) be damned.

Note they might still change this depending on feedback received. I would advise giving such feedback if you care at all.

Mail.app stuck at fetching mail on OS X 10.10.3

If Mail.app is stuck at “Fetching Mail….” with Gmail POP accounts after upgrading to OS X 10.10.3’s beta, be aware that Apple added OAuth support to Mail.app. Which is nice, except in the current beta, they don’t warn you to go set up OAuth permissions for every account. Mail.app will choke on fetching mail, without letting you know the actual problem. This is possibly POP3-specific, as I didn’t notice IMAP having this issue.

In the connection log:

[kCFStreamSocketSecurityLevelTLSv1_0] -- host:pop.gmail.com -- port:995 -- socket:0xxxxxx -- thread:0xxxxx
-ERR invalid SASL argument ......

The solution here is to simply set up Google OAuth via System Preferences -> Internet Accounts. It should automatically prompt you for OAuth permission to your Google Account when you click on the affected account in the prefpane. Once that is done, Mail.app will fetch Gmail via POP3 again.

I’ve also unticked “automatically detect and maintain account settings” under Advanced, in Mail.app’s accounts panel, though this might just be superstition rather than actual prevention of issues. I’m just old school and uncomfortable with the thought of “automagic” happening in my mail server settings.

If you’ve already given up and swapped to IMAP, but would like to come back to the Dark Side of email retrieval technology, see also:
How to setup a Gmail POP3 account from scratch on 10.10.3 beta

Selfsolved reference:
#127: Mail.app stuck at fetching mail on new OS X

I really need to rebuild Selfsolved. Someday, when I’m not trying to write.

restoring Safari preferences from backup files in OS X Mavericks

Recently I had the misfortune of having to restore some Safari settings from backup, on OS X 10.9 Mavericks. I have done this many times before on older OS X versions, without incident — simply pull the various preference files such as com.apple.Safari.plist from backup and replace the damaged/unwanted ones. Takes all of 2 minutes, and years ago, I had already wrote a shell script to do exactly that.

It turns out that after Mavericks, Safari is incredibly resistant to conventional methods of preference file backup and restoration. Considering that preferences in OS X have always been stored in XML-based preference lists, you would think (as in previous operating systems from 10.0 to 10.7) taking the relevant preference files and replacing the unwanted new ones in ~/Library/Preferences would be enough. But no, an incredible amount of effort is now required for a simple task:

  1. unhiding the Library directory, because clearly we’re all Windows babies who cannot be trusted to see where application preferences are stored
  2. replacing the actual preference files, scattered around the system in ~/Library/Safari, ~/Library/Preferences, ~/Library/Caches, and hopefully remember to have turned off iCloud, or otherwise see changes being clobbered by iCloud sync (or, worse yet, having experimental changes reflected all across a network of Mac and iDevices)
  3. resetting the preference cache daemon, cfprefsd so that preference changes can be reflected in a running system. This where a lot of people get stuck in general, judging by Google results; when they replace preference files and find that their changes aren’t being reflected, it leads them into a wild goose chase for “hidden preference files” for Safari, when the answer lies in a simply yet utterly non-obvious background daemon.
  4. restoring the list of installed extensions — which, incredibly, is NOT stored in the deceptively named com.apple.Safari.Extensions.plist, but in the login.keychain.

Context

Had some issues where certain websites were behaving differently under private browsing mode than normal browsing mode. I deduced there was some kind of corrupted stored state, whether it was a cookie or localstorage issue. Had the brilliant idea of setting Safari preferences aside, thus resetting Safari to factory state, and then divide-and-conquer by restoring parts of the settings until the problem recurs. I’ve done this many times before.

First I turned off iCloud sync, having been bitten by sync propagation of experimental changes in the past. This is pretty important if you don’t want to blow up Safari bookmarks (at the very least) across all Apple-manufactured, iCloud-compatible devices. I then removed ~/Library/com.apple.Safari.plist, ~/Library/com.apple.Safari.Extensions.plist, ~/Library/Safari, and ~/Library/Caches/Safari, ~/Library/Cookies. After resetting to confirm some issues have disappeared, I moved some files from backup to original locations. Imagine my surprise when nothing became restored, and all my Safari extensions (installed from the extension store or custom-built by me) disappeared.

Process

Increasingly desperate, I started to trace filesystem accesses using fs_usage. It showed nothing out of the ordinary. 30 mins of reviewing useless forum posts later, I pieced together a multi-stage solution. It turns out there were two separate obstacles.

Preference caching

Presumably to save energy, OS X Mavericks caches application preferences (in RAM?) using a daemon called cfprefsd. Instead of applications pulling their preferences from XML files on disk at launch, it requests this from the daemon instead. The defaults command has been modified to operate with this daemon, so if you had been working with preferences from the command line (as I have been), the changes have been transparent.

However if the preference files are changed or edited directly, this change is not propagated to the preference cache daemon. When the app is opened again, the cached version takes precedence, and is re-written out to disk, clobbering the restored versions.

This does not mean there are hidden Safari preferences somewhere that you haven’t found, though you might think this at first. When Safari is reset manually from the filesystem, or if the plist files are edited, cfprefsd must be reset as well.

There exists a cfprefsd daemon for every logged in user, running under that user’s privileges, as well as a root-owned one. Safari preferences are stored under the user domain, so the user-specific daemon is the one that needs a reset when files change. Can also quit the process from Activity Viewer, or killall cfprefsd. A login-logout cycle would also reset the user-specific daemon.

Extension list caching

Having done this reset with the backup files in place, most preferences will be restored on next launch, *except* the list of extensions you had installed previously. That will remain empty. Even though all the extensions and their settings have been restored to ~/Library/Safari.

For a long time I traced ~/Library/com.apple.Safari.Extensions.plist, and wondered why it wasn’t being read.

An Apple discussion forum post (shockingly enough) gave a vital clue. There exists an “application password” in the login keychain titled “Safari Extensions List”. Whether it is merely a cryptographic key, or the actual list of extensions, is unknown, but that is the critical preference to restore extensions. Having reset extensions by moving them away, this preference is apparently emptied out. The entire login keychain, being an encrypted document, has to be restored to a corresponding previous version to restore access to previous extensions. Without this, all extensions would have to be reinstalled manually (and get a new copy of the extension file stored into ~/Library/Safari/Extensions, instead of the previous version being reused).

Discussion

Given recent focus on energy consumption, I can understand preference caching. However, it’s not that hard to track filesystem changes (the Time Machine/Spotlight APIs explicitly do this!) and reload appropriate preferences when they are changed on disk. It would show respect for power users and developers who might need to interact with the preferences system in a more convenient way.

But stuffing extension lists in an obscure corner of a password keychain? What sense does that make? Are my list of extensions (not actual extension data or settings, mind you — those are in plaintext on the disk for anyone to copy and look at) such privileged information that it has to reside alongside my login password? Why can’t you just read the list of extensions, oh I don’t know, from the list of extension files installed into the Extensions directory? Wouldn’t that be a lot more reasonable?

A Twitter timeline to Atom feed proxy

So Twitter is retiring version 1.0 of its API in March 2013. In its ongoing quest to become (more) evil, Twitter has decided that open syndication standards like Atom are no longer worth supporting. This, in addition to the gratuitously byzantine OAuth system (even for 2-legged auth between my own client and Twitter itself), makes consuming Twitter content anywhere else except on Twitter (and its official apps) an increasingly annoying task. An intended effect, perhaps.

I’m one of the few holdouts who believe current Web standards work just fine. I consume a lot of content from the Web in my native RSS client, as part of my ordinary daily workflow, without using 50 different apps and dozens of notifications. This includes my Twitter home timeline (where I follow just under 70 people/orgs of interest), which under API v1.0 was provided as a simple, standard RSS feed, like other open streams of data on the Web.

I’d been hacking on a Python-based Twitter JSON API to Atom feed proxy for some time, but became increasingly disillusioned with the stupidity of the API — and that it takes two libraries and tons of code to even get the OAuth dance started.

So I thought, in this entire WWW, there must be someone else as annoyed by Twitter’s obstinacy as I am. Sure enough, Russell Beattie developed a single-file PHP script that accesses the authenticated Twitter stream and outputs an Atom feed.

I abandoned my Python code, forked that codebase, and made some minor modifications to suit my personal needs. This patched version is available here:

https://gist.github.com/yimingliu/4735445

All you need to do to use this script is to create your own Twitter app over at https://dev.twitter.com/apps (I called mine “TimelineProxy”), create an OAuth token, and fill in the blanks in the script. Since the new API also has a 100,000 user per application limit, it’s probably best for every user to have his own proxy app with its own token, instead of relying on a central one.

There are some minor differences between my version and the upstream original. Basically this version uses full php tags instead of the less-well-supported short tags, and replaces t.co shortened URLs with their full original URLs. I also take advantage of the html content type in the Atom entry to allow links in the entry text, so in most feed readers any links are “clickable”. Finally, this version returns proper HTTP error codes instead of 200 OK in case of Twitter API errors (like when you hit the rather draconian rate limits on each OAuth token).

However, it preserves the simplicity of the original, which is that you can drop this in the web directory of any PHP-enabled web server (no need for root access or installation of any libraries) and enable your own timeline proxy.

I want to eventually modify this script so that a single server can host any arbitrary user’s timeline as an Atom proxy, provided they give the proper auth tokens. This means having to deal with the OAuth dance at some point. Ugh.

In any case, this disturbing “enclosure movement” of the open Web — taking previously free streams of information and fencing them into walled gardens of content — is a trend that should be opposed whenever possible. My thanks to Mr. Beattie for making the original script.

fixing a scrambled IPython command history on stock OS X 10.6

So I started over with a fresh install of OS X 10.6 recently, and wanted to restore my Python development environment. In doing so, IPython is absolutely essential if you want a sane interpreter environment to test out code. I had a bit of trouble with it though.

The Problem

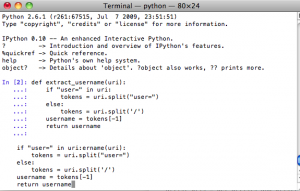
The stock Python 2.6 shipped with OS X 10.6 Snow Leopard has a readline module linked to libedit, the BSD alternative to the GPL’ed readline. The readline module, if you are not aware, is (among other things) responsible for keeping command history in the IPython interpreter. This causes command history in the IPython 0.10 interpreter to behave in very odd ways. When backtracking through the command history buffer using the up-arrow key, for example, the previous command is only partially recalled, and appears completely scrambled. Indents, too, seem off — in a whitespace-sensitive language like Python, this is annoying. (See first figure)

IPython command interpreter is broken when using libedit with command history

Fixing IPython’s bugs are beyond my ability. While I certainly don’t want to delve into the quagmire that is GPL vs BSD licensing, I do understand why Apple would want to avoid the viral nature of the GPL and ship libedit instead. However, using a genuine Readline library is going to be the best recourse for this problem. I already have a copy of readline compiled and ready to go, and just need a new version of readline.so, the library that links Python to readline.

The easy solution

Sifting through my records, I came across a SelfSolved problem record from my good friend Hannes who had issues with his IPython command history.

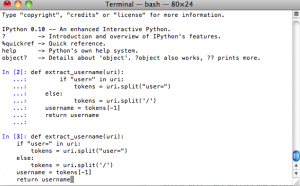
The solution: sudo easy_install readline, which uses setuptools to install a precompiled package of readline.so statically linked to genuine GNU readline. Restart your IPython console and everything should work. (See second figure)

IPython with readline

The hard solution

Being the inquisitive sort, I also wondered how I would be able to reproduce this work from scratch. readline.so ships with the Python source package, but surely I would not be required to compile a whole new copy of Python for one measly module library?

I documented this process in SelfSolved again: building readline.so for Python. At some point I should write an interface between SelfSolved and WordPress so that I don’t have to reproduce a lot of my work here manually.

Compiling readline.so

This is actually fairly easy.

  1. Get a copy of the Python source code. In OS X 10.6, it ships with Python 2.6.1.
  2. Unpack it and go into its directory. You should find a Modules subdirectory. In it is readline.c, the source file for readline.so.
  3. Compile the source file. The appropriate incantation is:
    gcc -O2 -arch x86_64 -arch i386 -shared -o readline.so readline.c -I/usr/local/include -I/System/Library/Frameworks/Python.framework/Versions/2.6/include/python2.6 -L/usr/local/lib -lreadline -ltermcap -framework Python

    where the -arch flags should be whatever processors you wish to support, the -I arguments should point to the directories that contain header files for the readline library and the Python framework, and the -L argument should point to the path for the readline library. Use whatever optimization flags you feel comfortable with, instead of -O2, if you wish.

Replacing readline.so

So now we have a readline.so that’s properly linked to readline.dylib. The thornier question is how to override the system-provided readline.so. The system version is located at /System/Library/Frameworks/Python.framework/Versions/2.6/lib/python2.6/lib-dynload/readline.so, and the naive would simply overwrite it with their new readline.so. This is a bad idea.

As I have mentioned in the past, overwriting system libraries in OS X is an unhealthy thing to do. The problem is that Apple furnishes no official package management system — anything you personally change is considered fair game for the next official system update. On the next system update, if the Python component is affected by the update, the Apple updater will happily clobber your compiled files with its own, leaving you suddenly back at square one. You don’t know how many times I’ve had to recompile emacs (for X11 support) on OS X 10.4 because of this little annoyance. Leave things in the /System/Library directory hierarchy alone, for your own sanity.

However, in this case /System/Library/Frameworks/Python.framework/Versions/2.6/lib/python2.6/lib-dynload comes ahead of the user-modifiable /Library/Python/2.6/site-packages directory on Python’s sys.path. So if you just drop readline.so into site-packages, the system version still takes priority.

There are a few ways to do this. For one, you can create a sitecustomize.py in /Library/Python2.6/site-packages. In this file, arbitrary Python statements can be written, and the interpreter will automatically execute them at runtime. So, you can add a sys.path = ["/dir/here"] + sys.path statement and point it to a directory containing your readline.so file. Alternatively, you can abuse the technique used in the easy_install.pth file. It turns out that if you ever used easy_install, directories pointed to by the easy_install.pth file takes priority over the system paths. They use an interesting way to accomplish this, which you can copy. Or, you can just insert your directory containing readline.so into easy_install.pth. In any case, this will force the readline-based readline.so to take precedence over the libedit-based readline.so, without overwriting anything.

Discussion

So for any sane person, the easy solution should be enough. For the rest, the hard solution is an interesting exploration of how some of Python’s built-in modules can be compiled and inserted individually.

Upgrading the Seagate Barracuda 7200.11 to firmware SD1A

TL;DR: If you’re applying firmware upgrade SD1A to Seagate drives, you need to double-check the firmware actually applied properly. If the Seagate patcher doesn’t work, make sure to use Legacy mode on SATA in the BIOS, instead of the more modern AHCI mode.

So perhaps you have heard of Seagate’s little manufacturing issue with its internal 3.5-inch Barracuda 7200.11 1TB drives a while back — namely, that some drives shipping with SD15 firmware are dying horribly. I had the unfortunate experience of buying such a hard drive — the ST31000340AS — as a scratch disk for my main machine, a MacBook Pro with a mere 240 GB internal drive (a pre-unibody revision, where the HD is insanely difficult to replace).

Seagate did in fact issue a firmware update — SD1A — that supposedly addressed this issue, but of course, there’s one catch: you can’t install the firmware through an external drive enclosure. In communication with Seagate support, a representative confirmed that for those of us without a desktop tower that has a SATA bay, we’re hosed:

Unfortunately, due to the nature of firmware updates and the way external drives work, the firmware update program cannot directly communicate with the drive in the manner it needs to in order to be able to upload the new firmware to the drive. It must be plugged into an internal SATA controller in order to update the drive.

Fair enough. That makes technical sense — but of course, it doesn’t work for me. I asked whether they would handle a mail-in repair, given that I have no easy access to such a desktop. The answer, of course, is No.

I have to find a desktop, open it up, jam this baby in (possibly in place of the existing drive if there’s only one bay), update the firmware, and put everything back together. Sadly, most of my friends who still own desktops would not trust me that far.

Half a year passes, and I finally find a sucker good friend who’s gullible awesome enough for me to try this procedure on his machine. The fellow owns a nice if aging Dell Precision T5400, which comes with two SATA bays (so I don’t have to inflict undue harm onto the existing system). Since this thing can run two drives at once, I can use the first method (a Windows-based firmware updater), though I burned a boot CD for the second method just in case. I popped in the drive, fired up Windows XP, downloaded the Windows-based Firmware Update Utility, double-clicked, and thought it was the (triumphant) end. In fact, it took 3 hours of my life to find out just how deep this rabbit hole goes.

Problem 1: The lying updater

The firmware updater will give a bunch of scary warnings and then reboot the machine. It will automatically reboot to a Seagate Loader screen, which attempts to apply the patch to all eligible SATA drives. To its credit, it’ll skip the non-qualifying (i.e. non-Seagate, non-Barracuda, etc.) drives, but it’ll still try them out first. At the end of the process, it will report “firmware downloaded” and “SUCCESSFUL” or some variant thereof, and automatically reboot back into Windows.

At this point, I advise you to use the SeaTools utility to verify that the firmware update actually applied. Despite its claims, if you were on a stock setup Dell T5400 (or perhaps other models as well), this will prove that the updater is a lying scumbag. And in fact, this particular drive still reported firmware SD15, the broken one.

Problem 2: The broken Boot CD

To save both me and my gracious host (who’s starting to suspect my computer-fixin’ skills now) some time, I decided to try the boot CD method, rather than pounding my head trying to see why the updater was lying. I downloaded the boot CD from the same Seagate Support site above, burned it to disk, and tried it out.

The result is a new SelfSolved posting: SelfSolved #59: getFatBlock error when upgrading Seagate Barracuda 7200.11 firmware. In essence:

The FreeDOS boot CD reports a number of ” error reading partition table drive 01 sector 0 ” errors. This is followed by ” get Fatblock failed:0x000000e8 ” or some variant of ” getFatBlock failed : ” The FreeDOS boot process appears to stall at this stage, and does not continue to the firmware flasher program.

That was lovely.

The Solution

I chased some red herrings. I came across postings about failures in various FreeDOS-based Seagate tools. One such post mentioned that it took a long time for the boot disc to get over the “error reading partition table” errors, but I waited forever (well, 15 minutes) and the boot process did appear to be frozen / stalled. I reformatted the drive via diskpart clean, thinking that the getFatBlock and error reading partition errors were related to a non-MBR partition table (I had it set to GPT). I should have realized, of course, that the errors were completely unrelated to filesystems, despite the “fat block” to which it refers.

The actual solution is deceptively simple — the boot disc & flasher appears to handle AHCI-based SATA mode badly. The Dell I was using was set to AHCI mode, out of the three possible Legacy, AHCI, and RAID options for SATA. Apparently the boot disc simply doesn’t handle this mode correctly on the Dell machine (and may also be related to why the Windows-based updater lies). When the machine switches on, use F12 to enter the boot menu, and select Setup to enter the BIOS. Then, on the list of Drive Options, skip past the SATA drives and down to SATA options. Pick the Legacy option to use ATA mode, instead of AHCI. Once this is done, the boot disc will function correctly, and the updated firmware will be applied without incident. Remember to switch the mode back to AHCI — it’s default for reason, no doubt.

The “error reading partition” messages were completely red herrings. They appear whether you are in the right SATA mode or not, and does not appear to affect the operation of the firmware updater or the boot process. It should not take very long to get to the flasher on this particular setup, so don’t wait on that message too long — it’s a good sign something’s not quite right.

In the end, I did recover my $100 hard drive, and the confidence of my peer in my mad hardware skillz (actually, quite non-existent).

Discussion

In the end, I’m quite appalled at Seagate. This sort of failure shouldn’t have happened, of course. Once it did, Seagate should have offered to take back and replace broken drives — the data I had on there was non-critical. I would have been perfectly willing to pay shipping costs to get a fixed replacement through mail-in service. I should not have been forced to search my social network for a person willing to let me tear his desktop computer apart, for a dubious and unsure firmware update procedure that fails mysteriously. I spent an additional 3 hours tracing mystery failures, for which the error messages were rather useless. Without my trusty iPhone and access to the Internet, I would not been able to solve this problem. How should I have known what “getFatBlock failed” means?

This little episode has convinced me to never buy a Seagate drive again — I simply cannot afford the time and energy for these sort of firmware upgrade adventures. While I was looking for a desktop to tear apart, I bought a Western Digital Caviar Black 1TB drive instead. Another $100, but at least I had a scratch drive for my work.

The moral of the story: Seagate, you are the worst storage vendor I’ve had to work with so far. I hope this record is not broken in the future.