A wishlist for a native Mac email client

As the tech-savvy sort, I often do some things that the typical consumer might not care about. However, it is strange that I simply cannot find a native Mac email client on the market that fulfills what I consider to be very basic features for decent email management. While everyone is gushing over the latest social network to be jammed into an email client, I just want my email to work in a sane way.

The features I’m looking for:

  • POP3/IMAP + SSL support
  • Full-text search, or indexable by OS X’s Spotlight
  • Multiple account support
  • Archival — if I delete an email account, it should not wipe out all emails from local storage that belonged to this account, especially if said account was POP3
  • Plaintext composition — I’m taking the side of format=flowed in plaintext composition. Manually formatting hard line breaks at char 78 is an insane holdover from a bygone age when dumb ASCII terminals were still the primary user interface. At least allow this as an option, or support the quoted-printable content type and soft line-breaks during composition.
  • Filtering rules — Basic filters that let me decide where to put messages based on mail headers and subject is enough
  • mbox import/export — I need to be able to import mail from my previous client. Similarly, in the scenario that this app is no longer supported, I need the option of moving to another client.
  • Bonus: auto-bcc to an arbitrary email address — I’ve never solved my problem with archiving sent mail. All you really need to do is auto-populate the BCC field on any “New Mail” composition window with this address. That’s all I really need to be happy here.

Amazingly enough, there is not a single Mac mail client that fulfills all of these basic conditions. Especially egregious problems for the top three mail clients:

  • Microsoft Outlook Mac 2011 — mangles all outgoing plaintext emails by inserting hard line breaks. No support for flowed plaintext, despite promises to the contrary, and no support for quoted-printable content-type and soft line breaks. No provision for auto-bcc.
  • Apple Mail (Snow Leopard) — deleting an old email account deletes ALL mail belonging to this account, even for downloaded POP3 mail. WTF. Can only auto-bcc “myself”, which is a fixed email address corresponding to the sending account; if you allow autobcc, why not let the user pick the email to autobcc to?
  • Mozilla Thunderbird 8 — deleting an account deletes all downloaded mail belonging to this account, unless messages are stored to the “local folder” rather than its inbox abstractions.

For fear of accidental data loss, I’ve stuck to the Microsoft offering, despite its incredible inability to keep plaintext mail intact. The newer social clients are all Thunderbird-based and leave little else worth examining — they seem far more interested in integrating ever more social network APIs than to support more basic email features. The rest of my friends are all sworn Gmail webmail users and think I’m a strange luddite for even considering native clients. I’ll leave the webmail vs native client debate for fear of going on a page-long rant; suffice to say that the user experience between the two options is not comparable at all.

It almost makes me want to start writing a new email client for myself, or hire someone to start some skeleton code at least, because obviously no one else is going to scratch this itch of mine. That kind of spare time and money, however, would probably never come unless I manage to actually sell a company or two (rather than just founding unsuccessful ones).

A Brief Guide to Golems of Amgarrak with a New Character

So I’ve been playing Dragon Age: Origins in the few spare hours I get every week. Having never finished Baldur’s Gate 2, this is redemption for my neglected gamer soul, I think. In general, it’s pretty easy. However, several of the most annoying battles in all of DAO are from the Golems of Amgarrak DLC. So far, all of the FAQs and guides I’ve seen (including videos on YouTube) are about absurdly min-maxed level 35 characters imported from Origins and Awakening, with elite gear, hundreds of poultices and potions, and the most overpowered skillsets.

This note is not about trouncing the Harvester with level 35 ubergeared supermen. Any halfwit can do that — just go get the gear, follow any YouTube min-maxing guide for DAO, and start whacking away. (My personal favorite: 100% dodge build: nothing can land a hit on you with physical attacks. Eat that, Harvester. But I digress). You can do this DLC easily with any properly geared character. This note is about how to complete Golems of Amgarrak on Nightmare difficulty with a newly created, level 20 mage, with stock gear and sneaky tactics. This is not to claim it’s the best way to accomplish the feat — just the way I managed it. If you have better ideas about how to use a newly created level 20 character to win, contribute them in the comments.

This note only applies to DA:O as played on the PC. On some console-based versions, the pet bronto cannot be controlled, making the final battle even more annoying than usual.

Background

If you don’t know yet, completing Golems of Amgarrak on Nightmare (or Hard, actually) difficulty awards all of the other characters in other campaigns (even existing campaigns’ characters) some really nifty items — but only nifty for lower level characters. This includes the amulet The High Regard of House Dace, which gives +6 cunning so Daveth can open up all those annoying chests in Ostagar, and The Reaper’s Cudgel, which is worth well over 300 sovereigns. The early cash allows you to buy the Blood Dragon Armor, the Spellward, and the Arcane Knowledge and Physical skill tomes from Bodahn immediately after Lothering before his store restocks; you can then buy another copy of these items after the restock.

With my time constraints, I will most likely play DAO only once. So I’d like to have these items in my Origins campaign, without having to complete the game first to get an absurdly well geared character to do Amgarrak. I thought I can just start a new Amgarrak campaign with a new character, and finish it to get my gear. Boy, was I wrong. People call this the hardest DLC for Origins, and for good reason. I played a warrior and simply could not win an initial fight against 4 elite golems, and had to delete, restart the campaign, and rethink my strategy.

General Setup

Despite claims, the module is not impossible, even with a new level 20 character. It is simply very poorly balanced for new characters, and forces you to proceed carefully and methodically. This is Dragon Age, not Diablo — as a new character, you cannot just rush into every battle, aggro’ing all the mobs at once. Separate mobs from each other, killing them one at a time, withdraw backwards to avoid being surrounded, pause frequently to issue new orders as the situation requires and don’t rely on the Combat Tactics scripts, and you should have very little difficulty dealing with most creatures in the module.

To win, I strongly suggest playing a mage. In fact, the best character for completing the DLC with is probably the mage, regardless of level. The main reason: there are no merchants, not nearly enough healing poultices, and most unfortunate of all, no other playable mage in the entire module. The objective is to preserve all potions and consumables until the final battle with the Harvester, which means the party will need to rely on mage healing spells.

The party at the start consists of a duel-wielding rogue, a bronto (with a charge attack and a Taunt), and the PC. The party at the end adds a sword-and-shield warrior (without Taunt!) and a Runic Golem with some typical golem abilities, plus a weak Group Heal, a Cleansing Aura, and Chain Lightning/Tempest spells. All of these characters are poorly configured with mediocre equipment, and the party only has one respec tome (Memoirs of the Grey Wardens).

Save the tome for the rogue. He’s going to be the main DPS character against the Harvester, but only if he’s an archer and standing far away from the action.

Attributes and Specializations

If starting this without having beaten Awakening, then the mage is restricted to three base specializations: Spirit Healer, Arcane Warrior, and Shapeshifter. Since Shapeshifter is worthless, the two specializations are decided already. If you have started Awakening, you might consider the Battle Mage instead of Arcane Warrior for additional utility, but Spirit Healer is an absolute must as a new character.

As a mage, 60+ magic is necessary for spells to have decent effect. The rest should be spent in willpower to pad out the mana supply. Usually, when you build a Mage for Origins or Awakening, you don’t want to put any points in Willpower. However, remember here, there are very few, very precious lyrium potions and no way to buy more; there are no special attribute bonuses that boost the mana pool for free; and the PC’s starting equipment is subpar and does not provide a large mana boost (and again, there is no way to buy better equipment). If you don’t take additional Willpower, you will not be able to cast during the long endgame battle against the Harvester, and that would be very unfortunate.

The mage should have maxed Combat Training to ensure that spells aren’t interrupted by ordinary attacks. Survival is a plus for the nature resistances, and the first level Vitality and Mana skills from Awakening. This is a pure combat module, with no ingredients for crafting and a grand total of two conversations — no need for Coercion or any of the crafting skills.

Talents

One might be tempted to build an armored arcane warrior, since this is a popular “I win” character build.

This would be … unfortunate. Normally, the arcane warrior is very overpowered: all the gear of a tank and the firepower of a mage. In this module, with a new character, you have neither of these advantages. The small module does not offer a merchant or any sort of decent armor, and a stock character does not have enough willpower to have a deep mana pool after putting up the arcane warrior defensive abilities. Wearing a robe, swinging a Warden’s Companion longsword with a mediocre shield, while not being able to cast healing spells — this is a recipe for disaster. Further, Brogan, the warrior in the party, is configured as a tank — a poor tank, but he can’t be respec’ed as a DPS due to lack of tomes, while the PC can be a DPS. Therefore, playing a support + nuker mage is probably a better choice. Some of the advice that follows will assume a mage with an assortment of crowd control and attack spells.

As for specific talents, since it’s a stock character, there aren’t that many points available. Here is my advice:

  • The Healing tree up to Regeneration is a must. As Spirit Healer, also take at minimum Group Healing, because both the golem enemies and the Harvester at the end have area-of-effect attack abilities that can damage an entire party. Remember that this character will be the only healer until the Runic Golem is fully upgraded, and even so, the Golem is a terrible healer. These healing spells are basically critical to finishing the module, and is why stock level 20 Warriors or Rogues have a hard time surviving.
  • Make sure to get Force Field, for several possible reasons. Crushing Prison is nice, but only if there are points for it.
  • It would be wise to take Mana Clash, at the top of the Mana Drain tree. In several battles (unfortunately, not the end battle), the party will face several spellcasters along with hard-hitting warriors. Mana Clash will immediately remove the casters from the scene, which trivializes the encounter.
  • For me, I took Tempest and Blizzard (from the Lightning and Cold trees), since I already have Spell Might from the Mana Drain tree. This sets up the Storm of the Century combination that was useful in one instance, but this is optional. I strongly recommend Cone of Cold in any case as it is an absurdly overpowered spell with a freezing effect that applies even to elites and bosses.
  • If taking Storm of the Century, or not taking Mana Clash, then Glyph of Neutralization is desirable. As for the other glyphs, since the main enemies are almost always elite or boss level golems and undead, they are often resisted — except the Paralysis Explosion combination, if set up correctly.
  • I did not use any other spells. If you have a favorite set, use the remaining points to take them. Remember that practically all enemies worth using mana on are Elite or above, so some spells that have minimum effect on elites are not worth taking.

Remember that only one party member will get a chance to respec, and the rogue should use it to reconfigure as a survival-minded DEX-based archer. This is because this underpowered party simply cannot stand toe-to-toe against any of the major enemies, and will rely on kiting (and not even simple kiting either, given the setup of the final battle) and off-tanking to survive many fights.

Jerrik, the Archer

Jerrik will be the main non-magical DPS. Unfortunately, he is setup as a frontline fighter. Because the tank is terrible, and can’t even manage threat effectively (no Taunt!), plus both enemy Golems and the Harvester have area-of-effect attacks to damage everyone in their immediate vicinity, this is a bad configuration. He must respec into a DEX-based DPS archer (enough STR to wear his armor, then all DEX), with Master Archer or Scattershot, Arrow of Slaying, and Feign Death (for the many times when the tank loses threat and the enemy rushes the archer). Optionally, he could take a few cunning and take Stealth to lose threat, though the final battle involves an elite boss and hordes of minions.

Major Battles

On Nightmare difficulty, in general, proceed slowly and cautiously, withdraw backwards into chokepoints when needed, and there should be minimal pain. In particular, when faced with multiple spellcasters, hit Mana Clash to remove most (if not all), and then rush them. Play this as a normal RPG and use the pause key frequently to strategize and adjust tactics. Try not to use any consumables until the final fight. For a general walkthrough, follow Gamebanshee’s Amgarrak guide.

There are two battles that takes some strategy to pull off, however. Some people are stumped here and can’t proceed further. They’re not hard, but you can’t use the normal tank-and-spank tactic with a level 20 Warden and a crappy party.

The ancient hall of golems

As soon as the party enters Amgarrak, there are three directions to go, two of which are sealed off at the start. In the third direction, there is a room with four stationary golems. Two of them are called Watchers, the other two are elites called Sentinels. When the party proceeds far enough into the room, these four will activate.

This is one of the toughest fights because the party does not have its warrior tank yet. Further, these four golems will open the battle by hurling rocks — which deals heavy area-of-effect damage and knocks down any character beside the Runic Golem. They will then follow by using Slam on the incapacitated character, and then Hurl Rock again, basically going into a stunlock until the character is dead.

Careful pulling is impossible, because all four activate at the same time. However, there is one good way to deal with these golems: The Hallway of Doom.

There is a chokepoint hallway going into the hall of golems. The party could fight the golems one-on-one at the doorway, but they’ll jut use Slam to knock the blocker out of the way and rush into the room. Then again, they won’t be able to do that …if the blocker is force-fielded.

Have the party hold position. Use the Runic Golem to trigger the four enemy golems, and then run back to the door. At the doorway, use the Runic Golem to block the door and force field the golem before he gets Slammed. Have the ranged DPS open fire. Force Field your own golem, because the enemy golems are elite and will have shorter Force Field durations.

For even better effect, throw down a Blizzard to slow the enemy as the Runic Golem approaches. Then, trigger Storm of the Century using Tempest, and then Force Field your Runic Golem before it gets seriously damaged. Now the enemy will stand in the massive electrical storm, be drained of stamina by the lightning storm’s side effect (so they can’t Hurl Rock or Slam anymore), and run around uselessly. When the Force Field expires, withdraw the Runic Golem and slaughter the heavily injured enemies (or heal the Golem until you’re able to Force Field again — the enemy should no longer have enough stamina for another Slam).

Make sure the mage is standing off to the side as the Runic Golem runs toward the party, because the enemy could see the mage and interrupt the casting with a hurled rock. If you cast the Force Field too late, the enemy will Slam the blocker out of the way, which will probably cause a party wipe.

I really wish I had two mages in this module, which would be able to keep this little trick going forever. Alas, that is not to be.

NOTE: If you didn’t take Storm of the Century Force Field, or if you can’t get the blocking trick to work, there is another way. You need to have respec’ed Jerrik with at least Combat Stealth. Have the party hold position far away from the action, have Jerrik walk into the hallway and trigger the golems. When the golems activate, Stealth immediately and walk away. Using Jerrik, carefully pull the now activated golems, one or two at a time, and kill them individually as they follow you down the hallway. This is arguably easier, if less impressive, than the hallway blockade trick.

The green room

Again, a horde of golems.
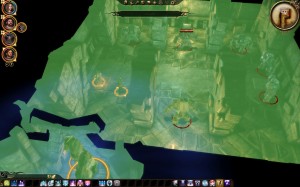
all golems hostile in the golem room
This time, the party needs to flip a switch in the green phase, which triggers an encounter with four boss golems and two elite golems. If you didn’t feel enough hurled rocks and full-bodied rock slams in that previous golem encounter, this one will surely give enough. Even with Brogan the warrior, no one in a level 20 party can tank through that. There is a doorway chokepoint, but boss golems have huge resistances, and even a full Storm of the Century will only take off 1/3 of their hitpoints on Nightmare. The blocker golem won’t survive too long after the Force Field expires; certainly not long enough to get another Force Field up. Once again, they all activate at the same time, so you can’t pull one away by itself…or can you?

This one needs an underhanded trick. Remember, there was a room next to the starting chamber of the Amgarrak level with a blue and a purple switch. Both of these switches will throw the party out-of-phase with the golems, meaning that they disappear from the map. When this happens, the hostility chase trigger is also reset. If you can somehow kite the golems to other rooms, then run to the switch to go into blue or purple phase, walk away while phased out, and then switch back into normal phase when you’re far away enough…these golems will lose sight of you and stand still. Furthermore, now they’re isolated from each other, and you can pull each one independently instead of triggering all six at once! This means you can pull each golem, kill it, heal, and repeat.
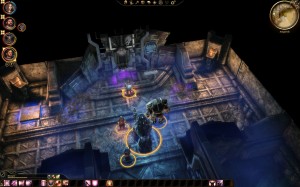
Run back into this room and hit a switch to avoid the chasing golems
So the strategy is as follows: after you hit the green room switch to activate the golems, immediately run back out of the room, down the stairs, and toward the starting chamber. The faster you run, the more the enemy golems aren’t going to keep up, and will be strung out along the way. As you arrive in the switch chamber, switch phase. All the golems disappear as you go out of phase with them.

Walk back to the green room, switch phase again, rob the chests if you need to, and return to normal phase. Slowly go down the stairs again, pull each golem one at a time along the way, kill them one by one until you arrive at the switch room again. Problem solved.

The Final Battle

This is the fight that few people seem to win as a poorly geared level 20. This is because they are going toe-to-toe with the Harvester flesh golem. There are two major problems with this.

  1. The Harvester hits for 90+ damage, and crits for 100+ damage on Brogan or the tank, due to the crappy equipment setup of the stock party. There are not enough healing poultices or spells to keep the tank alive at that rate.
  2. There is a second problem — the Harvester in the Flesh Golem phase periodically summons a skeleton, either with his Vile Disembowelment skill, or they just wander into the room. As the flesh golem takes damage, the skeletons spawn faster. The skeleton is usually elite, which hits really hard, or boss, which can seriously damage even the tank. This isn’t even the main problem — the real problem is that the skeletons go after the DPS’ers. Because Brogan has terrible threat management, the skeletons will wander into the room, go immediately for the caster or the archer, use Riposte to stun them, and hit for 50+ on leather and even higher on cloth. If the mage and/or the golem goes down, it’s a guaranteed wipe.

Since the tank can’t hold up, the only strategy is to kite the Harvester around the room. There is plenty of space to maneuver, but there is not enough DPS with a stock party to take it down quickly enough. Jerrik hits for 80 to 100 per arrow on the Harvester, and crits for a bit higher. The mage hits at around 30 or 40 with the staff and more with spells if not resisted, but she can’t cast too many attack spells as healing is very needed and there are about 10 to 20 lyrium potions in all. The rest of the party is fairly useless in terms of DPS, since they’re melee and can’t get a good hit in on the Harvester as it walks around. The room is going to be filled with skeletons. They all have stun skills. If the kiter take a stun or two, he will get swarmed and probably die.

Preparation

The party needs to set some basic tactics.

  • Brogan needs to take the least powerful health poultice at 25% health or less
  • Jerrik needs to set typical archer tactics, and feign death at health < 10%
  • The PC’s mage needs to drink a least powerful lyrium potion at 25% mana, cast Regeneration on an ally when the ally’s health is < 50%
  • The Runic Golem should turn off his Hurl Rock and Quake tactics, and cast Group Heal when an ally’s health < 50%

Have the Runic Golem set Flame Weapons. When the battle begins, coat weapons with the highest level poison you have available.

Phase One

In Phase One, the Harvester will jump inside a flesh golem and open with a Vile Disembowelment, an area-of-effect attack that immediately spawns a new skeleton.
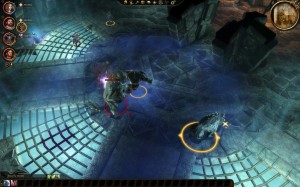
The initial setup against the Harvester

As the fight begins, set the party to Hold Position, and manually move the party members into position. The mage and the archer should go stand by the switch that appears, but far enough apart that they don’t get nailed by the same AOE attack at the same time. Brogan needs to stand close by as the off-tank. The Runic Golem should stand at the center of room with his Cleansing Aura. The bronto (which actually has Taunt and runs faster than any other character in combat) should attack the Harvester, throw down a Taunt, and then start kiting the Harvester around the Runic Golem’s aura radius.

If a normal skeleton appears, Brogan should go tank it immediately, and the mage can help freeze it with a Cone of Cold. If an elite or boss skeleton appears, or if there are more than 3 skeletons, have the mage pull the switch immediately to destroy all the skeletons. Jerrik should always focus on the Harvester. If either the archer or the mage is under attack, have the bronto run over and Taunt, then run the mage and/or archer away. The skeleton should lose interest and focus on the bronto. If not, Brogan needs to pick it up and tank it while the DPS’ers run far away.

Heal the bronto constantly, as it’ll inevitably get hit by the Harvester and its skeletons. If the bronto is stunned, or if it is killed, Brogan must pick up threat and resume kiting immediately until Jerrik is able to resummon the bronto. Switch back once the bronto is up again.

(If this is starting to feel like playing a MMO 5-man dungeon boss encounter, except you have to control every party member by yourself, well…yes. Use that Pause function. The Pause key is the one major difference here that lets you control the multiple things going on in this encounter.)

Keep an eye on the archer and mage while you’re kiting with the bronto. Make sure no skeleton has wandered into the room and started attacking them. Pause a lot if you need to.
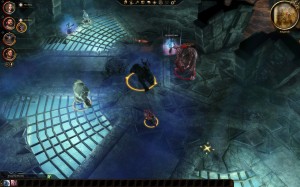
Nearing the end of the First Phase of the Harvester Fight
If this is executed correctly, eventually the Harvester will fall. When its health gets very low, try to avoid hitting the switch and save it for just before Phase Two. The switch will not appear again at that point, and there may be several skeletons that need killing at the end.

There is a bit of luck involved. If the switch is hit too early, and elite skeletons emerge while the switch is inactive, then this is probably bad. If it’s a boss skeleton, you might consider using Brogan to kite it around until the switch is available again. Controlling two kiters is very difficult, so pause a lot.

Phase Two

When the flesh golem is killed, the Harvester will jump out and attack. If the party made it this far, and the switch is still available, then the battle is more or less won. The Harvester lizard-form is far, far weaker than its previous flesh golem body. It hits for about 60 on Brogan, but hits slowly and misses a lot, so it can be tanked. It also disengages a lot to channel a skeleton summoning spell, so it doesn’t have a lot of DPS to hit the party with. The best news: skeletons will no longer wander into the room in large packs — at this point, the Harvester has to summon one with his spell.

When the game screen comes back from the cutscene, hit the switch one last time to clear out all remaining skeletons if it’s still available. If not, resume the kiting strategy and quickly remove the remaining skeletons. Then, have the party resume normal attack stance from hold position and focus fire on the Harvester’s lizard form. If it uses the jump ability, cast Crushing Prison (it won’t resist nearly as much now) or the Runic Golem’s Slam attack to slow it down while the melee attackers catch up. It can also be frozen solid with Cone of Cold, though it can’t be shattered obviously. Jerrik and the mage are still going to be the main DPS. If the Harvester finishes channeling a normal or elite skeleton, tank it with Brogan and blast it down quickly. If it’s a boss skeleton, Force Field it or have the bronto kite it around the room while the remaining party members continue to blast the Harvester. It is only a matter of time before the Harvester dies.

The Grim Reaper achievement should hit the screen after a short cutscene. Woot!

The first time I did this, it took me three tries and about an hour of playing, but is definitely a reproducible strategy on Nightmare difficulty. If playing on Hard, this is actually really easy, as most skeletons will be normal skeletons and can be frozen and shattered. It does take a lot of micromanagement, but since you can pause the game and issue new orders, this management shouldn’t be too hard — kinds of reminds of me Baldur’s Gate 1, where I auto-paused after every combat round and barely took any damage.

As a final word: the builds and strategies outlined in this note are *not* how you should typically play DAO. Given an entire campaign to work with, the builds here are suboptimal. These builds are designed only to complete this specific module, within the constraints that it imposes.

musings on self and search

So as you may be aware, I developed SelfSolved in order to avoid cluttering up this blog with “I fixed this!” posts. I’m trying to get into a habit of writing at a higher conceptual level, instead of this repository being just yet another technical problems blog. It turns out that without writing about random things that I fixed, I have little else to say. When I wrote up problems for this blog, I had monthly posts. Now I’ve gone 3 months without writing anything.

It’s odd, as Ph.D. students (and former startup founders) can hold forth via very long and extensive blog posts, especially on technical topics they care about (and sometimes on topics that they don’t). It may speak to my lack of aptitude for Ph.D. work; I hope not.

When I implemented SelfSolved, I created a sitemap for search engine crawlers as a matter of course, but did not do so immediately. Lots of content were present on the site before I completed the sitemap feature. It turns out that search engines like the GOOG seem to ignore certain content in the sitemap — so much for indexing all the world’s knowledge. I thought the crawler would get around to it eventually, but it doesn’t appear to be the case after nearly a year.

It’s interesting, because there doesn’t to be any rules. For example, “turning caching off completely in Pylons” has a very short problem statement and solution. Other posts, however, are fairly normal: “SVN directory is viewable through Apache” is by all accounts a normal sized SelfSolved problem, with references and a full solution writeup. As of this post, neither are indexed.

As soon as I wrote this blog post on this WordPress installation, the post became available in GOOG’s main index. If I search on the phrases above, I get an entry back immediately. But for a site like SelfSolved, these indexes aren’t available for days or weeks, even though SelfSolved publishes an Atom feed of its content as well, and pings the same GOOG notification URIs. This does suggest that if you build your site on a well-used CMS, rather than custom-designed software, it will get you into indexes in almost real-time vs in days. If you run a for-profit content-driven site (which SelfSolved is not), that could mean a fair bit of money.

It’s no wonder that SEO consultancies are flourishing. There are certain hidden rules with crawling that go beyond the simple “create good content” and “get a sitemap” guidelines that the GOOG wants you to believe.

fixing a scrambled IPython command history on stock OS X 10.6

So I started over with a fresh install of OS X 10.6 recently, and wanted to restore my Python development environment. In doing so, IPython is absolutely essential if you want a sane interpreter environment to test out code. I had a bit of trouble with it though.

The Problem

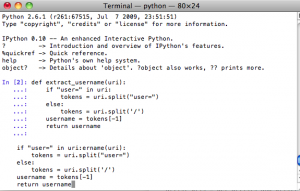
The stock Python 2.6 shipped with OS X 10.6 Snow Leopard has a readline module linked to libedit, the BSD alternative to the GPL’ed readline. The readline module, if you are not aware, is (among other things) responsible for keeping command history in the IPython interpreter. This causes command history in the IPython 0.10 interpreter to behave in very odd ways. When backtracking through the command history buffer using the up-arrow key, for example, the previous command is only partially recalled, and appears completely scrambled. Indents, too, seem off — in a whitespace-sensitive language like Python, this is annoying. (See first figure)

IPython command interpreter is broken when using libedit with command history

Fixing IPython’s bugs are beyond my ability. While I certainly don’t want to delve into the quagmire that is GPL vs BSD licensing, I do understand why Apple would want to avoid the viral nature of the GPL and ship libedit instead. However, using a genuine Readline library is going to be the best recourse for this problem. I already have a copy of readline compiled and ready to go, and just need a new version of readline.so, the library that links Python to readline.

The easy solution

Sifting through my records, I came across a SelfSolved problem record from my good friend Hannes who had issues with his IPython command history.

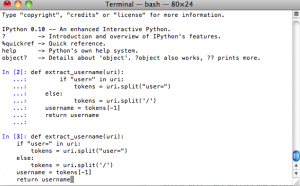
The solution: sudo easy_install readline, which uses setuptools to install a precompiled package of readline.so statically linked to genuine GNU readline. Restart your IPython console and everything should work. (See second figure)

IPython with readline

The hard solution

Being the inquisitive sort, I also wondered how I would be able to reproduce this work from scratch. readline.so ships with the Python source package, but surely I would not be required to compile a whole new copy of Python for one measly module library?

I documented this process in SelfSolved again: building readline.so for Python. At some point I should write an interface between SelfSolved and WordPress so that I don’t have to reproduce a lot of my work here manually.

Compiling readline.so

This is actually fairly easy.

  1. Get a copy of the Python source code. In OS X 10.6, it ships with Python 2.6.1.
  2. Unpack it and go into its directory. You should find a Modules subdirectory. In it is readline.c, the source file for readline.so.
  3. Compile the source file. The appropriate incantation is:
    gcc -O2 -arch x86_64 -arch i386 -shared -o readline.so readline.c -I/usr/local/include -I/System/Library/Frameworks/Python.framework/Versions/2.6/include/python2.6 -L/usr/local/lib -lreadline -ltermcap -framework Python

    where the -arch flags should be whatever processors you wish to support, the -I arguments should point to the directories that contain header files for the readline library and the Python framework, and the -L argument should point to the path for the readline library. Use whatever optimization flags you feel comfortable with, instead of -O2, if you wish.

Replacing readline.so

So now we have a readline.so that’s properly linked to readline.dylib. The thornier question is how to override the system-provided readline.so. The system version is located at /System/Library/Frameworks/Python.framework/Versions/2.6/lib/python2.6/lib-dynload/readline.so, and the naive would simply overwrite it with their new readline.so. This is a bad idea.

As I have mentioned in the past, overwriting system libraries in OS X is an unhealthy thing to do. The problem is that Apple furnishes no official package management system — anything you personally change is considered fair game for the next official system update. On the next system update, if the Python component is affected by the update, the Apple updater will happily clobber your compiled files with its own, leaving you suddenly back at square one. You don’t know how many times I’ve had to recompile emacs (for X11 support) on OS X 10.4 because of this little annoyance. Leave things in the /System/Library directory hierarchy alone, for your own sanity.

However, in this case /System/Library/Frameworks/Python.framework/Versions/2.6/lib/python2.6/lib-dynload comes ahead of the user-modifiable /Library/Python/2.6/site-packages directory on Python’s sys.path. So if you just drop readline.so into site-packages, the system version still takes priority.

There are a few ways to do this. For one, you can create a sitecustomize.py in /Library/Python2.6/site-packages. In this file, arbitrary Python statements can be written, and the interpreter will automatically execute them at runtime. So, you can add a sys.path = ["/dir/here"] + sys.path statement and point it to a directory containing your readline.so file. Alternatively, you can abuse the technique used in the easy_install.pth file. It turns out that if you ever used easy_install, directories pointed to by the easy_install.pth file takes priority over the system paths. They use an interesting way to accomplish this, which you can copy. Or, you can just insert your directory containing readline.so into easy_install.pth. In any case, this will force the readline-based readline.so to take precedence over the libedit-based readline.so, without overwriting anything.

Discussion

So for any sane person, the easy solution should be enough. For the rest, the hard solution is an interesting exploration of how some of Python’s built-in modules can be compiled and inserted individually.

Upgrading the Seagate Barracuda 7200.11 to firmware SD1A

TL;DR: If you’re applying firmware upgrade SD1A to Seagate drives, you need to double-check the firmware actually applied properly. If the Seagate patcher doesn’t work, make sure to use Legacy mode on SATA in the BIOS, instead of the more modern AHCI mode.

So perhaps you have heard of Seagate’s little manufacturing issue with its internal 3.5-inch Barracuda 7200.11 1TB drives a while back — namely, that some drives shipping with SD15 firmware are dying horribly. I had the unfortunate experience of buying such a hard drive — the ST31000340AS — as a scratch disk for my main machine, a MacBook Pro with a mere 240 GB internal drive (a pre-unibody revision, where the HD is insanely difficult to replace).

Seagate did in fact issue a firmware update — SD1A — that supposedly addressed this issue, but of course, there’s one catch: you can’t install the firmware through an external drive enclosure. In communication with Seagate support, a representative confirmed that for those of us without a desktop tower that has a SATA bay, we’re hosed:

Unfortunately, due to the nature of firmware updates and the way external drives work, the firmware update program cannot directly communicate with the drive in the manner it needs to in order to be able to upload the new firmware to the drive. It must be plugged into an internal SATA controller in order to update the drive.

Fair enough. That makes technical sense — but of course, it doesn’t work for me. I asked whether they would handle a mail-in repair, given that I have no easy access to such a desktop. The answer, of course, is No.

I have to find a desktop, open it up, jam this baby in (possibly in place of the existing drive if there’s only one bay), update the firmware, and put everything back together. Sadly, most of my friends who still own desktops would not trust me that far.

Half a year passes, and I finally find a sucker good friend who’s gullible awesome enough for me to try this procedure on his machine. The fellow owns a nice if aging Dell Precision T5400, which comes with two SATA bays (so I don’t have to inflict undue harm onto the existing system). Since this thing can run two drives at once, I can use the first method (a Windows-based firmware updater), though I burned a boot CD for the second method just in case. I popped in the drive, fired up Windows XP, downloaded the Windows-based Firmware Update Utility, double-clicked, and thought it was the (triumphant) end. In fact, it took 3 hours of my life to find out just how deep this rabbit hole goes.

Problem 1: The lying updater

The firmware updater will give a bunch of scary warnings and then reboot the machine. It will automatically reboot to a Seagate Loader screen, which attempts to apply the patch to all eligible SATA drives. To its credit, it’ll skip the non-qualifying (i.e. non-Seagate, non-Barracuda, etc.) drives, but it’ll still try them out first. At the end of the process, it will report “firmware downloaded” and “SUCCESSFUL” or some variant thereof, and automatically reboot back into Windows.

At this point, I advise you to use the SeaTools utility to verify that the firmware update actually applied. Despite its claims, if you were on a stock setup Dell T5400 (or perhaps other models as well), this will prove that the updater is a lying scumbag. And in fact, this particular drive still reported firmware SD15, the broken one.

Problem 2: The broken Boot CD

To save both me and my gracious host (who’s starting to suspect my computer-fixin’ skills now) some time, I decided to try the boot CD method, rather than pounding my head trying to see why the updater was lying. I downloaded the boot CD from the same Seagate Support site above, burned it to disk, and tried it out.

The result is a new SelfSolved posting: SelfSolved #59: getFatBlock error when upgrading Seagate Barracuda 7200.11 firmware. In essence:

The FreeDOS boot CD reports a number of ” error reading partition table drive 01 sector 0 ” errors. This is followed by ” get Fatblock failed:0x000000e8 ” or some variant of ” getFatBlock failed : ” The FreeDOS boot process appears to stall at this stage, and does not continue to the firmware flasher program.

That was lovely.

The Solution

I chased some red herrings. I came across postings about failures in various FreeDOS-based Seagate tools. One such post mentioned that it took a long time for the boot disc to get over the “error reading partition table” errors, but I waited forever (well, 15 minutes) and the boot process did appear to be frozen / stalled. I reformatted the drive via diskpart clean, thinking that the getFatBlock and error reading partition errors were related to a non-MBR partition table (I had it set to GPT). I should have realized, of course, that the errors were completely unrelated to filesystems, despite the “fat block” to which it refers.

The actual solution is deceptively simple — the boot disc & flasher appears to handle AHCI-based SATA mode badly. The Dell I was using was set to AHCI mode, out of the three possible Legacy, AHCI, and RAID options for SATA. Apparently the boot disc simply doesn’t handle this mode correctly on the Dell machine (and may also be related to why the Windows-based updater lies). When the machine switches on, use F12 to enter the boot menu, and select Setup to enter the BIOS. Then, on the list of Drive Options, skip past the SATA drives and down to SATA options. Pick the Legacy option to use ATA mode, instead of AHCI. Once this is done, the boot disc will function correctly, and the updated firmware will be applied without incident. Remember to switch the mode back to AHCI — it’s default for reason, no doubt.

The “error reading partition” messages were completely red herrings. They appear whether you are in the right SATA mode or not, and does not appear to affect the operation of the firmware updater or the boot process. It should not take very long to get to the flasher on this particular setup, so don’t wait on that message too long — it’s a good sign something’s not quite right.

In the end, I did recover my $100 hard drive, and the confidence of my peer in my mad hardware skillz (actually, quite non-existent).

Discussion

In the end, I’m quite appalled at Seagate. This sort of failure shouldn’t have happened, of course. Once it did, Seagate should have offered to take back and replace broken drives — the data I had on there was non-critical. I would have been perfectly willing to pay shipping costs to get a fixed replacement through mail-in service. I should not have been forced to search my social network for a person willing to let me tear his desktop computer apart, for a dubious and unsure firmware update procedure that fails mysteriously. I spent an additional 3 hours tracing mystery failures, for which the error messages were rather useless. Without my trusty iPhone and access to the Internet, I would not been able to solve this problem. How should I have known what “getFatBlock failed” means?

This little episode has convinced me to never buy a Seagate drive again — I simply cannot afford the time and energy for these sort of firmware upgrade adventures. While I was looking for a desktop to tear apart, I bought a Western Digital Caviar Black 1TB drive instead. Another $100, but at least I had a scratch drive for my work.

The moral of the story: Seagate, you are the worst storage vendor I’ve had to work with so far. I hope this record is not broken in the future.

Subversion 1.6.2 runtime error on network access on OS X 10.5

A new SelfSolved solution is up for perusal. The problem I tried to solve:

After compiling Subversion 1.6.2 from source on OS X 10.5 Leopard, the compilation is apparently successful, but svn dies when it tries to connect to the network for the first time. Crash log reports that symbols are missing from libneon.dylib.

Crash report from shell:

dyld: lazy symbol binding failed: Symbol not found: _ne_set_connect_timeout
Referenced from: /usr/local/lib/libsvn_ra_neon-1.0.dylib
Expected in: dynamic lookup

dyld: Symbol not found: _ne_set_connect_timeout
Referenced from: /usr/local/lib/libsvn_ra_neon-1.0.dylib
Expected in: dynamic lookup

Check out the places that I googled and my final solution writeup … at SelfSolved #49: Subversion 1.6.2 explodes on first network access.

The problem is very similar to a previous compilation issue I solved for PHP. In essence, the -L library search path passed to GCC at compilation time has /usr/lib in front of everything else. This means whatever library path you might have given to it at configure time, it’ll always look for the library in /usr/lib first, picking up the old system libneon in the process. Since the bad libneon dynamically linked, the problem doesn’t manifest itself until runtime — and only at runtime with network access involved.

As with the PHP issue, change the very first -L/usr/lib to -L/usr/local/lib (or wherever your newer libneon is located), and it’ll link correctly.

Out of curiosity, I checked MacPorts first. The MacPorts solution of disabling libneon version checking is odd — it also works, but I dunno if it’s linking to the right thing or not.

finding a fault-tolerant HTML parser for iPhone SDK

A new SelfSolved problem is ready for perusal:

A couple of my iPhone projects require a decent HTML/XHTML parser. On OS X, Cocoa ships with NSXMLDocument, which includes dirty HTML parsing functionality from libtidy. Unfortunately, NSXMLDocument is not part of the actual iPhone 2.2 SDK (though it is part of the 2.2 Simulator — so it’ll compile just fine at dev time but break when deploying — a big gotcha if you never tested against a real iPhone).

NSXMLParser is a part of the iPhone SDK…This is not a reasonable alternative.

Check out my writeup at SelfSolved #42: HTML or XHTML Parser for iPhone SDK 2.x

Finally, all out of all the potential alternatives I found (all referenced at the SelfSolved writeup — including one that requires a license fee to use), this one seems to be the most promising and requires the least amount of pain (read: interaction with the libxml C API — god knows I’ve done enough of that while building prototypes at Yahoo! Research Berkeley)

Musings on the state of popular science fiction

Received an email from a good friend on the “new and improved” Star Trek:

I gave this some thought, and perhaps one could say that blowing up Vulcan is a symbolic “fuck you” to the core values of Trek, to wit: “Logic, reason, humanism–fuck these things! Do what feels right regardless of the consequences. Or you’ll get sucked into a black hole.” Vulcan, I think, represented a key component of the Federation’s philosophy, and now they expect us to accept its destruction so they could thrill some casual viewers?

To my mind, the interesting tension in the Trek universe prior to this travesty resulted from Federation principles being tested against competing internal and external forces. However, in Trek: Rebooted land, there’s one hand clapping–it’s all barbarism all the time; there were no discernible Federation principles in the first place. You know, in Star Trek VI, Spock said “Logic is the beginning of wisdom, not the end.” New version: “Fuck all that shit man, party on the Enterprise!” Logic is apparently a trifle to be jettisoned whenever your adrenaline glands act up.

I think this has become a fairly general problem in what is considered “mainstream” sci-fi — the shows that “ordinary people” would accept. The so-called more real vision of the future espoused by these things can roughly be generalized into “darker, edgier, younger”. Reality, as it seems, must be full of angst, petty problems, and on the occasion, explosions.

A far cry from when the thoughtful visions of TNG garnered mainstream viewers by the millions.

There’s a quote attributed to AI pioneer Marvin Minsky, of the MIT AI Lab:

“General fiction is pretty much about ways that people get into problems and screw their lives up. Science fiction is about everything else.”

The point of science fiction is to imagine what is possible beyond the confining frameworks of everyday reality and drudgery. It is supposed to illustrate what humanity is capable of and what they should aspire toward.

TNG, for example, aimed to explore a post-scarcity human society where the driving force is no longer personal economic gain. Of course it would not be “real”, so much as matter replication and warp drive are also “not real”. An average man of today would have to have to stretch his imagination to understand the motivations of those characters and their society — but that’s precisely the point. If we all spun in place forever, mired in the minutiae of what is (rather than what should and will be), there would never be any progress — only more of the same.

This is also part of a rather annoying trend in popular culture to treat technology as something to be feared, and how curiosity should be punished. How many recent sci-fi successes can be boiled down to: “Don’t research/develop technology X, because it’ll just destroy all humans/blow up the world/nuke us and all of our colonies!”. It is trivially easy to spin a cautionary tale of fear for the new and unknown, to play to the most primitive parts of the human mind — such fearmongering undoubtedly holds TV ratings and sells movie tickets. It takes a true visionary to look into what might be the next step for human progress, and instead of fearing the unknown, embrace it.

The Original Series inspired a generation of young people to become scientists and engineers. The Next Generation taught the value of deliberation, diplomacy, and teamwork, creating a vision of a humanity pulling away from the basest parts of its past — and moving onto bigger and better things. While they are still quite entertaining, they are part of that grand tradition of science fiction, opening the minds of ordinary people and pushing them, if only a little bit, toward exploring “final frontiers”.

What do the latest and leading “sci-fi” do for that vision?

MenuMeters integer overflow in memory stats

MenuMeters is a very cool, free (as in freedom) system monitoring tool for OS X that sits in the menu bar and shows you live statistics, including such values as current bandwidth usage, current network activity, memory usage, page faults, etc.

One thing that has been irritating me lately is that there’s a cosmetic error MenuMeters 1.3 that causes negative values to appear in the VM Statistics section of the memory stats display. For example, the page faults value can roll over INT_MAX to report -1,800,000 page faults, when I’ve used the same OS X session for a long time without rebooting.

Since MenuMeters is GPL’ed, a quick lookthrough at its codebase reveals the problem. The details of this problem and solution is currently documented as #32 MenuMeters Memory Meter reports negative page faults at SelfSolved, a new web application I’ve written to keep track of these things.

More details to follow.

SSH, Subversion through SOCKS proxy on Mac OS X

UPDATE Apr 2, 2012
Due to the complete lack of updates for tsocks, I recommend the use of proxychains over tsocks. It accomplishes the same thing but works out of the box.

One persistent problem that I run into is that I need to access certain network resources through a SOCKS proxy server. This is all well and good if they are web resources — Safari, Firefox, etc. support SOCKS proxies quite well. However, I also need, for example, SSH and Subversion access to some resources. SOCKS support is woefully inadequate or nonexistent in these tools.

In the case of SSH, even if you google for this, you’ll run through thousands of examples of using ssh as a SOCKS server, but not through one as a SOCKS client. There are some convoluted solutions, but none of them I can use directly on an OS X 10.5 machine.

TSocks: the solution…if it were that easy

Now, tsocks is a nifty little tool to transparently divert network calls through a SOCKS 4 or SOCKS 5 proxy. This allows even non-SOCKS-aware applications to function through a SOCKS server.

Unfortunately it is very old, unmaintained code (1.8 beta 5 was released in 2002). It doesn’t compile cleanly on OS X due to this, nor will it compile under GCC 4.x. Further, it won’t work out of the box either if you do manage to compile it. The problem is that it relies on the Linux-only LD_PRELOAD functionality to use a shared library to hijack network system calls. This mechanism is called DYLD_INSERT_LIBRARIES on OS X and only works if DYLD_FORCE_FLAT_NAMESPACES is active.

Getting a working tsocks: MacPorts

There is an easy way to get tsocks. MacPorts ships a ported tsocks package. If you use MacPorts, sudo port install tsocks should do it.

Unfortunately on several machines I don’t use MacPorts, and don’t want to pull down an entire third-party package manager with its own library tree on each of these boxes. So I have do to this the hard way.

Getting a working tsocks: rolling my own

First to notice is that there are two tsocks distributions. One is the original tsocks 1.8b5, last updated in the first half of this decade. To make it work, follow the instructions provided by Marc Abramowitz in 2006. Note that his patch is actually located at his new domain address instead of the old, linked one.

The MacPorts distribution, on the other hand, is based on R. Garcia’s patched tsocks distribution, incorporating some modernization and new features by the Tor team. This distribution is numbered 1.8.x, with the last being 1.8.4. Unfortunately it is also no longer maintained, as the Tor devs forked this into a custom version to use with the Tor network only. Unfortunate, but for now, it still compiles, and works a bit better than the 2002 original.

To roll your own tsocks via source out of the MacPorts distribution, you will want the patches from the MacPorts repository. An outline of the compilation procedure:

  1. Download tsocks 1.8.4 from the author’s page
  2. Download all the patches from the MacPorts repository
  3. Concatenate all of the patches together:
    cat patch-* > tsocks.osx.patch
  4. Put the concatenated tsocks.osx.patch file into the tsocks source directory. Apply the patches:
    patch -p0 < tsocks.osx.patch
  5. Regenerate the configure script:
    autoreconf
  6. Configure the package:
    ./configure --prefix=/usr/local --bindir=/usr/local/bin --mandir=/usr/local/man --sysconfdir=/etc --libdir=/usr/local/lib
  7. Install the library and binaries:
    sudo make install
  8. Install the conf file:
    sudo cp ./tsocks.conf.complex.example /etc/tsocks.conf
  9. Edit the conf file. Make sure that if you’re not using tor, that you write in the conf file
    tordns_enable = false

Configuring tsocks

The complex configuration file example should have explained all of the features to be set. For my configuration:

Some important settings:

  • local – this setting, in the format of IP/netmask can be repeated several times, each time to exclude a set of IPs from being diverted to the SOCKS server. For obvious reasons, your SOCKS server will have to exist in one of these excluded IP ranges – otherwise you will never even reach your proxy server.
  • server and server_port – these should point to the IP address and port of your SOCKS server
  • server_typetsocks defaults to SOCKS4 mode. You may wish to set it to 5 for SOCKS5 usage.
  • tordns_enable – this needs to be set as false if you don’t use Tor.

Using tsocks

Once this is set up, simply prefixing the network command you want to run with tsocks will force a diversion through the proxy connection. For example:

tsocks ssh example.com

The same can be applied to Subversion.

tsocks svn update

will force the svn client to act through the proxy set in tsocks.conf.

SOCKS on localhost

Note that SOCKS services on 127.0.0.1 has a minor gotcha. Sometimes, you are able to SSH into a remote machine, and use that connection as your SOCKS server. This is described in my post about using SSH as a pseudo-VPN, which describes the -D switch. My use case here is that once you do this, all further local SSH connections to other machines should be diverted through the first SSH. For example, I’d like to do:

my-machine$ ssh -D 40000 gateway.example.com # establish a SOCKS server on localhost:40000 to the gateway host

and then:

my-machine$ ssh lan-1.example.com # access the protected lan-1 machine through the SOCKS, which will see me as gateway.example.com 

This is very doable in the tsocks setup if you set tsocks.conf:

server = 127.0.0.1/255.255.255.255
server_port = 40000

and then:

my-machine$ ssh -D 40000 gateway.example.com
my-machine$ tsocks ssh lan-1.example.com

This is the gotcha: make sure the netmask is set correctly to 255.255.255.255. Otherwise tsocks will die with a cryptic:

IP (127.0.0.1) & SUBNET (0.0.0.0) != IP on line 22 in configuration file, ignored

It is apparently fairly sensitive about the subnet mask setup to conform to exact standards.

With this tsocks setup, you won’t have to create special VPNs to lock a LAN machine behind a gateway. As long as you can SSH into the gateway machine from your local machine, you can access the resources behind it with any application on your local machine via tsocks. Nifty, huh?